This post may contain affiliate links. Please read our disclosure policy.
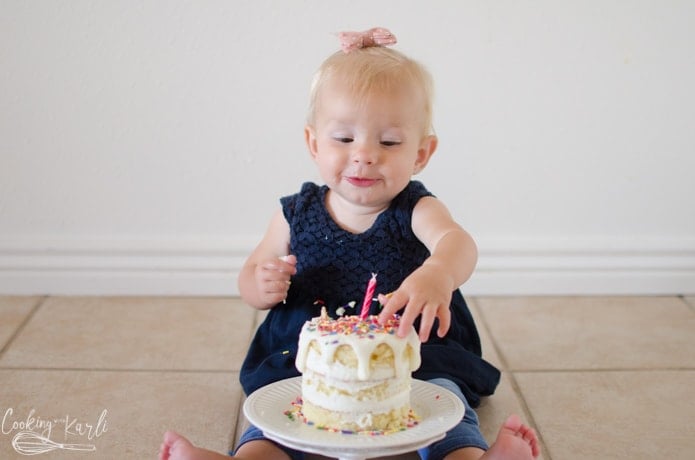
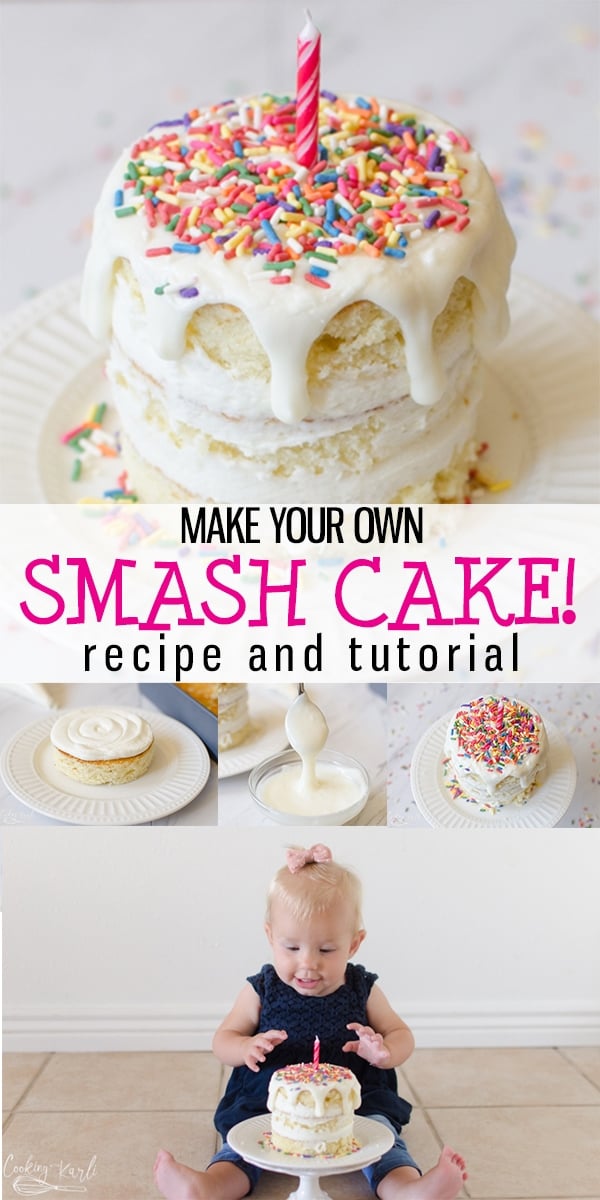
Smash Cake Recipe and Tutorial is a step by step guide to show you how to make a Smash Cake that is simple and easy! This Smash Cake is great for a first birthday and photos! Easily customizable, this Smash Cake is one cake fits all!
You will love this DIY Smash Cake
This recipe is perfect for when you only need a little cake! This vanilla cake is full of vanilla flavor and uses simple, everyday ingredients. This recipe yields 12 cupcakes, one 8×8 cake, or 1 round cake.
What is a Baby Smash Cake?
Having a small cake specifically for smashing on a baby’s first birthday has become quite popular over the past few years.
My baby is turning 1 in just over a week. Honestly, where has time gone?
Last year at this time, I was a large, emotional mess. And that is putting it lightly! ?
I am happy to report that this year I am much more emotionally stable. Although, my good friend is having her baby TOMORROW and I am 100% totally and completely jealous. Newborns are the best. #allthehearteyes
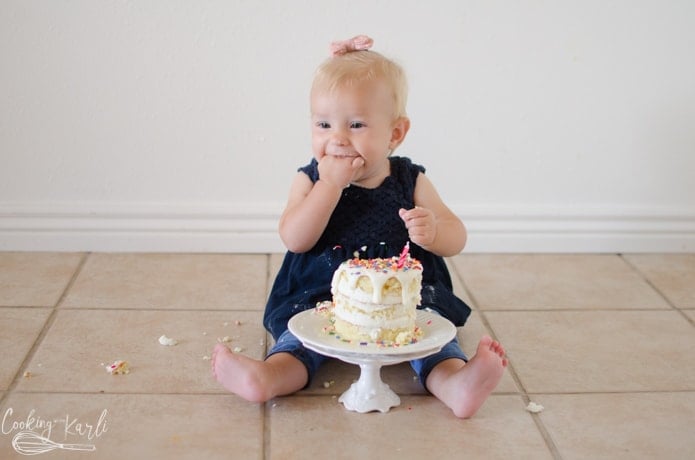
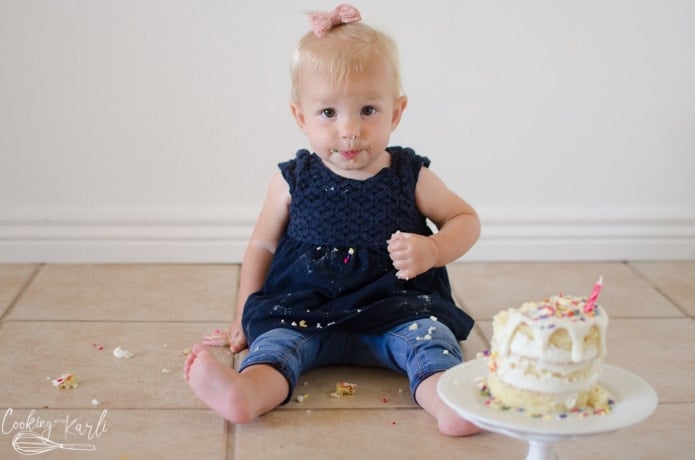
For all of my baby’s first birthday’s we have done a cake smash. I have to say, Marlee’s was the best so far I think. Brielle was hilarious though, she just kept staring at me and nodding like ‘oh yeah, this is real good!’.
I love letting my babies go a little crazy on something sweet, because most of the time it is their first experience with something like that. It is so fun to capture their reactions on camera.
Baby Smash Cake Recipe ingredients
- 1/2 cup butter melted
- 1 cup granulated sugar
- 2 eggs
- 1 tbsp vanilla
- 1 1/2 cups flour
- 1 1/2 tsp baking powder
- 3/4 cup milk
Baby Smash Cake icing ingredients
- 1/4cup butter room temperature
- 1 1/2cup powdered sugar
- 1tsp vanilla I like to use clear vanilla
- 1 1/2-2tbsp milk
How to make this Smash Cake Recipe for Baby
Yes, you could totally use boxed cake and store bought frosting.
In case you would rather make your own, here is how the cake and frosting came together.
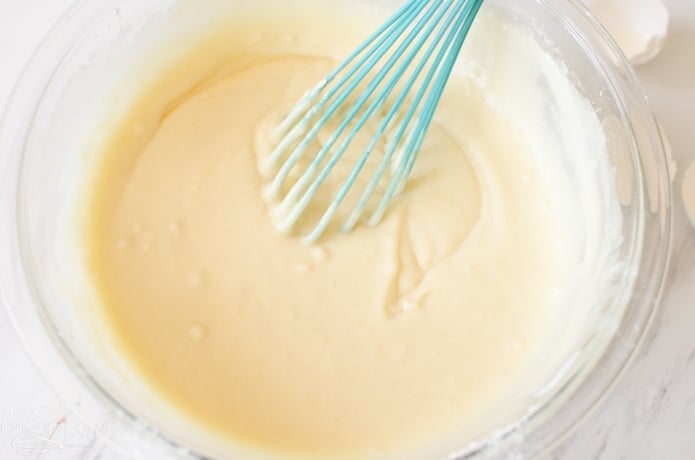
- For the cake, Mix together melted butter and sugar. The sugar should cool the melted butter down a bit, double check that it is cool and then add in the eggs.
It is important that the butter has cooled or else the eggs will cook when they come in contact with the hot butter!
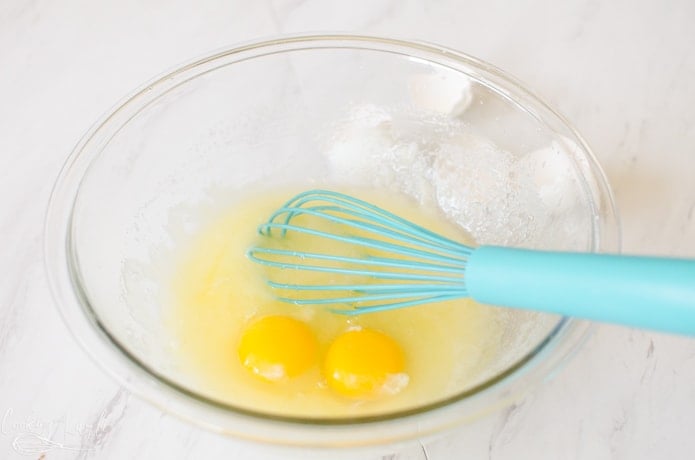
2. Once the eggs have been whisked in, add in the vanilla, flour, baking powder and milk. The batter will be slightly thick.
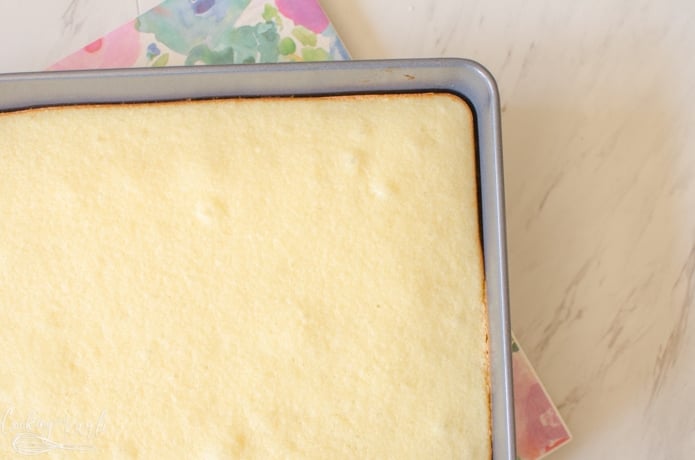
3. Pour into a either small round cake pans, or if you don’t own any/don’t want to go buy some, be like me and bake it in a 9×13 pan.
4. It is important to really grease and flour the pan you will be using.
5. I baked at 350° for 15 minutes. You’ll know the cake is done when a toothpick comes out clean.
6. Cool completely to room temperature and then toss un the freezer for 20 minutes.
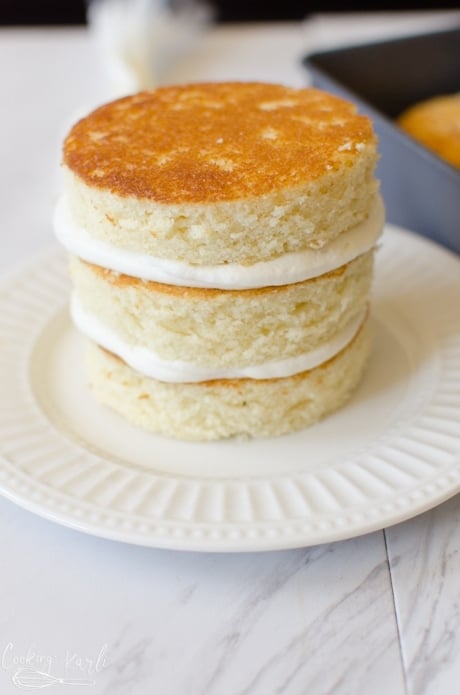
7. Once chilled in the freezer, leave the cake in the pan and cut out large circles using a cookie cutter. My cookie cutter is 4 inches wide.
8. Cut the circles out of the cake and then carefully remove the excess cake around the edges.
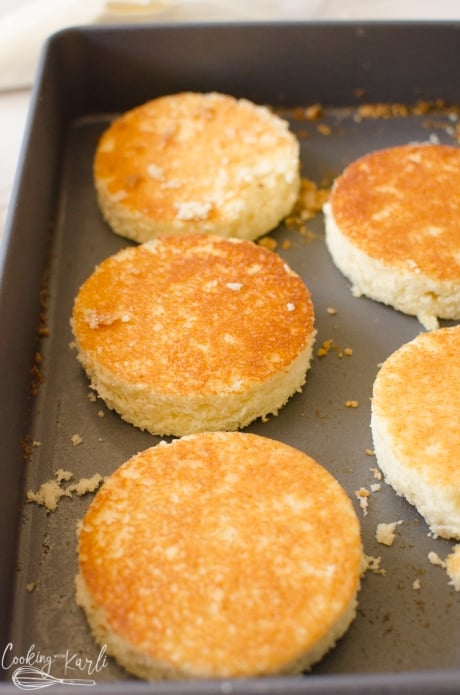
9. Pop the cake back into the freezer while the frosting is prepared. Chilled cakes are much easier to frost and are extremely less crumby.
10. The frosting is super simple, just butter, powdered sugar, vanilla and milk whipped together using an electric mixer.
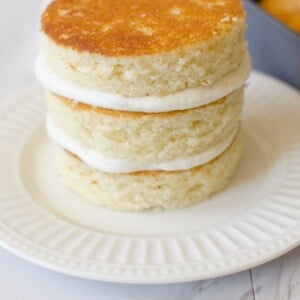
How to assemble this Smash Cake Recipe
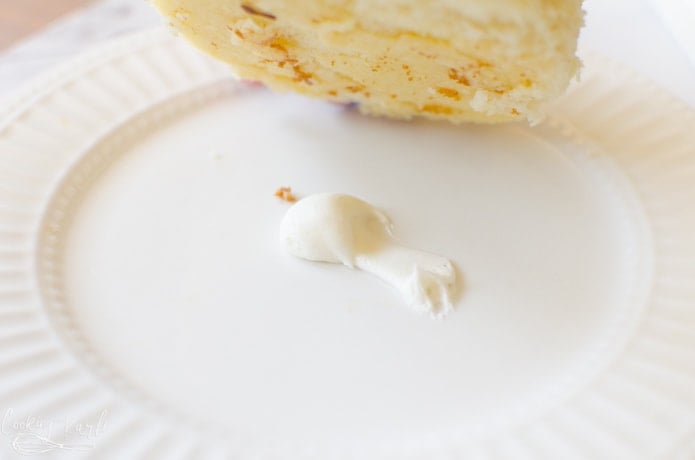
The first thing I like to do is to put a little frosting onto the serving plate before putting the bottom layer down. This just helps to keep everything where it is supposed to be. ?
How to make the icing for this Smash Cake Recipe
- To make the Vanilla Buttercream Icing, toss butter, powdered sugar, milk and vanilla into the stand mixer and mix on medium-high speed for 3 minutes.
Put the frosting in either a piping bag or a ziplock bag and clip the corner off.
Pipe the frosting around in a swirl covering the entire top of the cake.
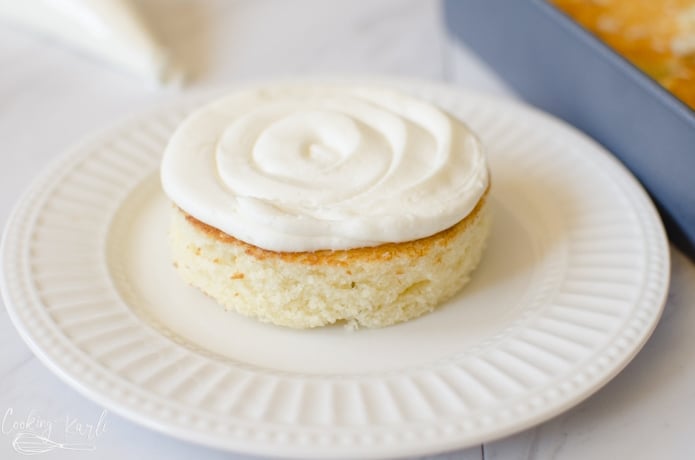
Stack the next layer on top of the frosting and repeat until all layers have been used up.
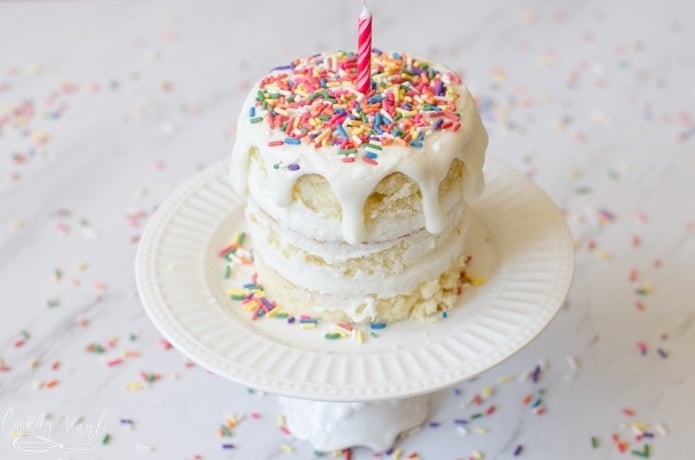
You can leave the sides as is, or I took an off-set spatula and spread the frosting that was spilling over the edge a bit to get the ‘naked’ cake look.
Melt the remaining frosting in the microwave. Only microwave for about 10 seconds. You want it thin enough that it is pourable but thick enough that it won’t just run off the side of the cake.
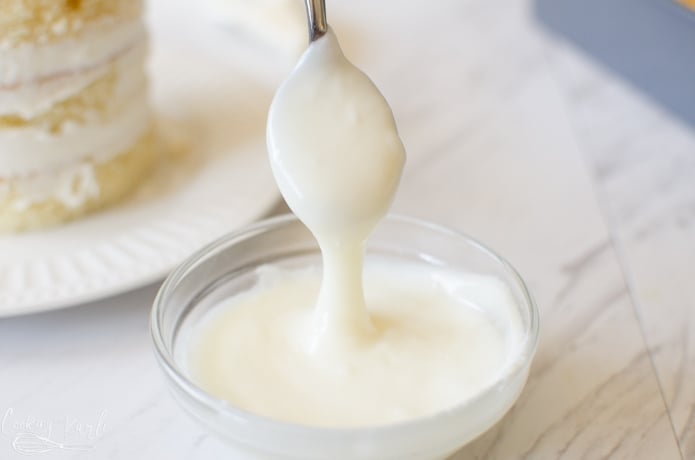
Pour the warm, thick frosting on top of the cake and quickly push the frosting to the edge of the cake so it drips down the sides.
Top the cake with lots an lots of sprinkles. This is really good at covering up some not so appealing frosting if need be. ?
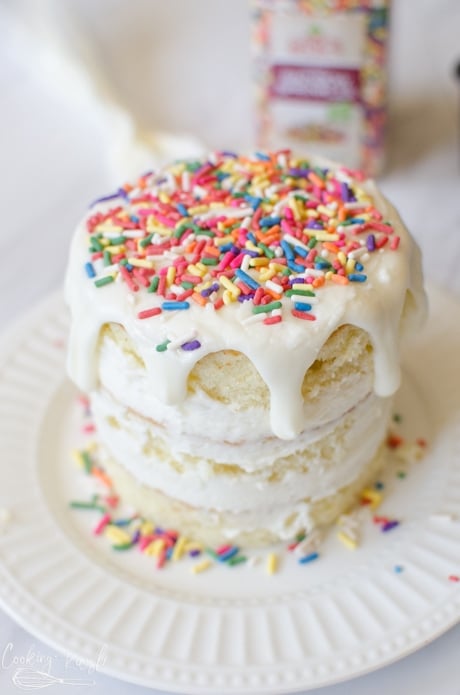
Place a candle on top and you are done!!
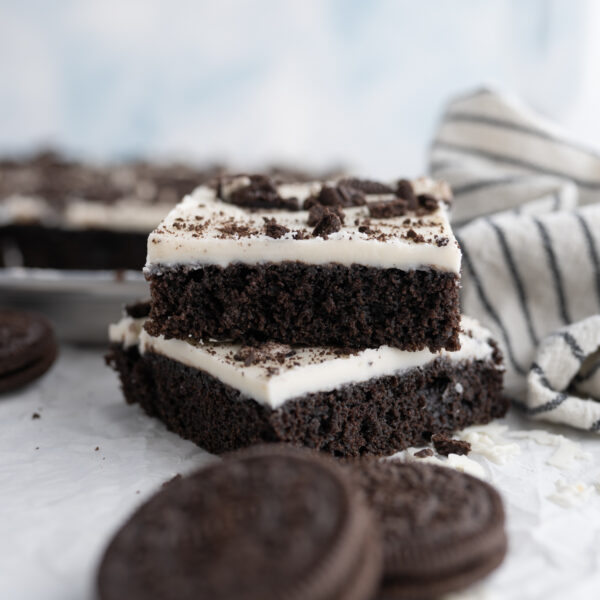
This cake is so easy to customize to anything you can imagine. Use chocolate cake, chocolate frosting with crushed Oreos on top! Add some food coloring to the pourable frosting to give the cake another pop of color! Really, the possibilities are endless (and delicious)!
Baby Smash Cake Recipe FAQs
Leave off anything that the baby could grab and choke on.
No, the cake does not need to be refrigerated.
I like doing a small, 4inch 3 layer cake.
Other Posts I think you might like:
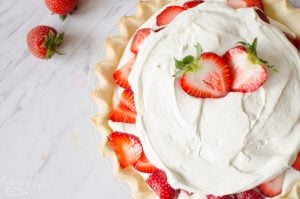

Strawberries and Cream Pie
Behind The Scenes of Cooking with Karli
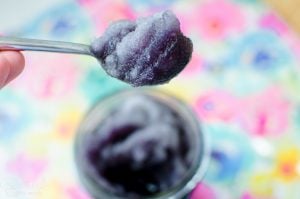
Slurpees
Thanks for stopping by my website! Did you make one of my recipes? I’d love to see!! Tag @cookingwithkarli!

Baby Smash Cake
Ingredients
- 1/2 cup (111g) butter, melted
- 1 cup (230g) granulated sugar
- 2 eggs
- 1 tbsp vanilla
- 1 1/2 cups (228g) all-purpose flour
- 1 1/2 tsp baking powder
- 3/4 cup (177mL) milk

Instructions
- Preheat oven to 350°F (180°C).
- Stir the sugar into the melted butter. The sugar should cool the butter down to room temperature.1/2 cup (111g) butter, 1 cup (230g) granulated sugar
- Add in the eggs and vanilla. Whisk well.2 eggs, 1 tbsp vanilla
- Whisk in the flour, baking powder and milk. Whisk until no lumps remain.1 1/2 cups (228g) all-purpose flour, 1 1/2 tsp baking powder, 3/4 cup (177mL) milk
- Bake in a well greased pan at 350°F (180°C) for 15-20 minutes, depending on the pan. Pull out of the oven when a toothpick comes out clean.
- Cool completely before removing from pan or frosting.
- For Smash Cake assembly instructions, see post above.


This smash cake recipe is adorable and so easy to follow! I can’t wait to try it for my little one’s first birthday. Thanks, Karli, for sharing such a fun idea!
This smash cake recipe is absolutely adorable! I can’t wait to try it for my baby’s first birthday. The tips for decorating are super helpful too. Thanks, Karli!
This smash cake recipe is absolutely adorable! I love how simple and healthy the ingredients are—perfect for a first birthday celebration. I can’t wait to try this for my little one’s big day! Thanks for sharing!
This smash cake recipe is absolutely adorable! I can’t wait to try it for my baby’s first birthday. Thanks for sharing such detailed instructions and tips!