This post may contain affiliate links. Please read our disclosure policy.
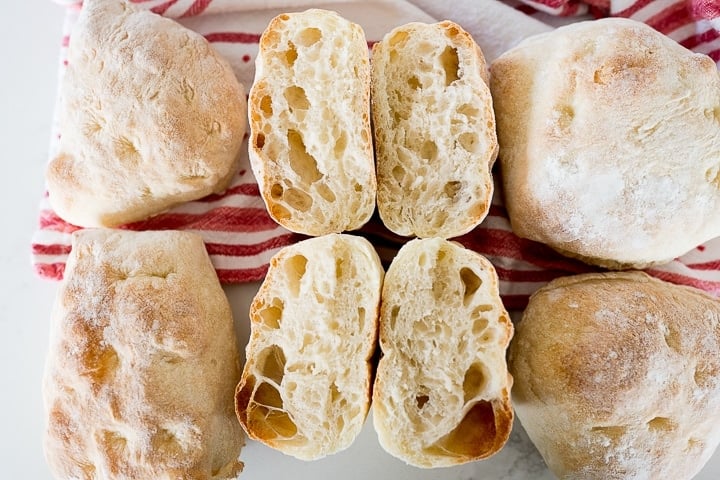
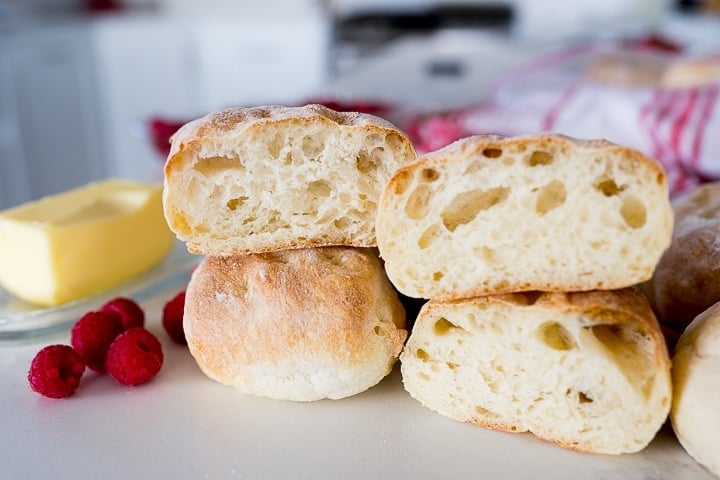
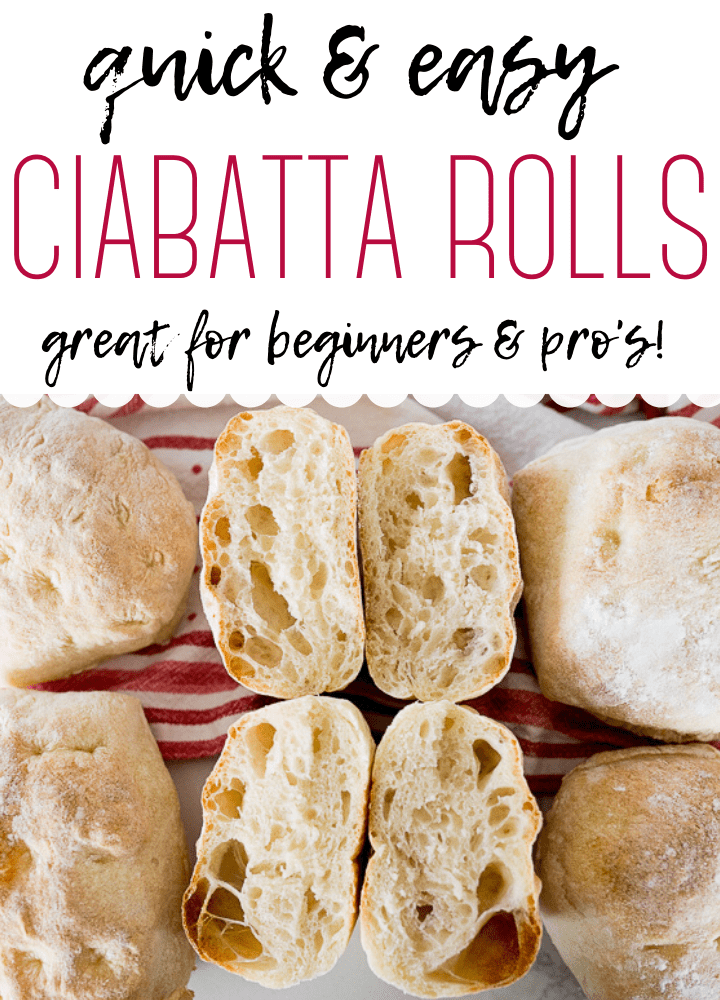
Ciabatta Rolls are a combination of a crispy crust and a chewy crumb that is airy, filled with holes! This version can be made in a few hours instead of over the course of a day or two.
Ciabatta
Ciabatta (pronounced cha-bah-tuh) is an Italian white bread that is known for it’s gorgeous holes inside. The bread, or in this case rolls, have a rustic feel which means they don’t ever look perfect, which means no matter what they look like, they are perfect.
The dough is also really unique. Made up of only the simplest ingredients the final dough is WET. Wet, but totally manageable. Honestly, this may be my favorite dough to work with.
Back in the day, this bread was made my slapping the wet dough onto the counter instead of kneading. Luckily we can use a higher speed on our stand mixer to do this easily for us. If you don’t have a stand mixer personally, borrow one from a friend because that is one tool you’ll definitely need to make this recipe.

Ciabatta Roll
You can make Ciabatta Bread, in a loaf, or you can make ROLLS, which is what we are talking all about today. After many, many batches and tweaks, I’d like to report that I have made better Ciabatta rolls than I can get at Sam’s Club.. and Sam’s Club is 30 minutes away! So by the time I drive there, spend way too much money inside and then drive home, I could have made them from scratch. Boom-shaka-laka. 😉
My absolute favorite thing to pair with my Ciabatta Rolls is shredded beef to make delicious French Dip Sandwiches. This bread is perfect for soaking up all of those drippings!
Ingredients in Ciabatta Rolls
- Water: We will need warm water for this recipe, looking for anywhere around 100°.
- Yeast: Active Dry or Instant Yeast will work well for this recipe. We will use a total of 1 3/4 tsp.
- Flour: No fancy flour needed, all we will use is All-Purpose Flour.
- Salt: There is 2 whole teaspoons of salt in this recipe, this does not make the bread salty by any means, it enhances the natural flavor of the bread.
How to make Ciabatta Dough
Ciabatta dough is comprised of 2 parts. The Biga (think of it like a starter) and then the ciabatta dough. The Biga is classically mixed together and then sits, bubbles and ferments overnight prior to baking the bread or rolls.
The Biga
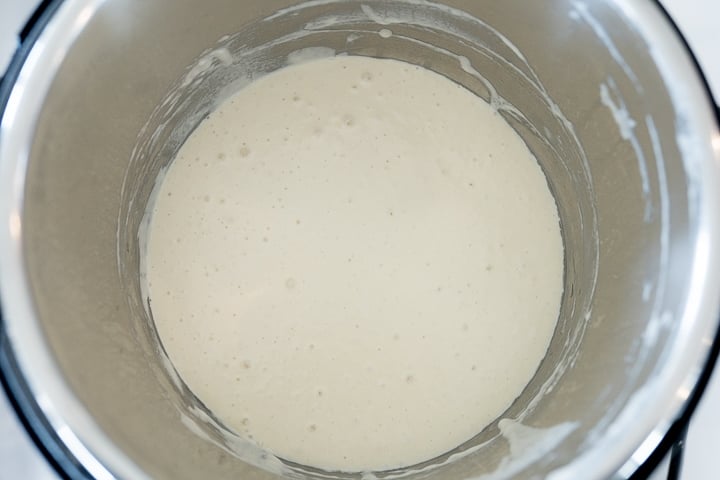
Don’t worry, we won’t be waiting. I have a cheat for that! The Instant Pot Yogurt Button. (cue the hallelujah chorus.) The Biga is a combination of water, yeast and flour. The Biga will sit and ferment quickly using the yogurt (less) button in 45 minutes! When it is done it will be warm, and have a lot of bubbles in it. (see photo below) Psst. If you don’t have an Instant Pot, you can do the same in a warm oven!
The Biga is what gives the roll it’s flavor, chewy crust and crumb, so definitely don’t skip this!!
The Biga is now mixed together with more water, yeast, flour and salt in a stand mixer. I use a Kitchenaid Mixer. Mix everything together slowly using the dough hook until all of the flour is combined. Then kick the speed up on your stand mixer until it is about medium high, in between the 4 and 6 on your Kitchenaid. Now, walk away (but keep and eye on it, it is going to get a little crazy!) for a good 10 minutes. (pro tip, just put the mixer on the floor so it doesn’t fall off of the counter. 🙂 )
The dough is very wet. You are going to think you’ve done something wrong but hold tight!! At about the 10 minute mark, something magical will happen. The dough will pull away from the bowl and gather around the hook. You will hear regular slapping of the dough against the sides of the bowl. Allow the dough to knead like this for an additional 5 minutes after it gathers to the hook.
If your dough isn’t gathering around the hook, add in a little extra flour 1 tbsp at a time until it gathers around the hook.
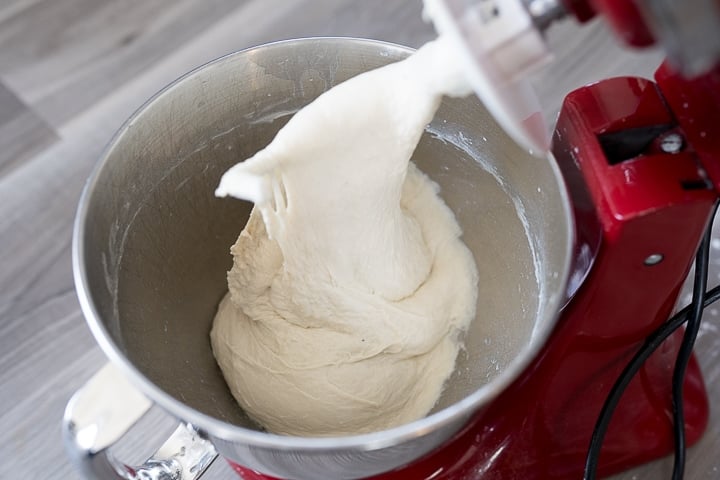
As soon as you stop the mixer, the dough will slow motion puddle at the bottom of the bowl, that is exactly what you want to see. It will be very smooth and shiny.
Rising the dough
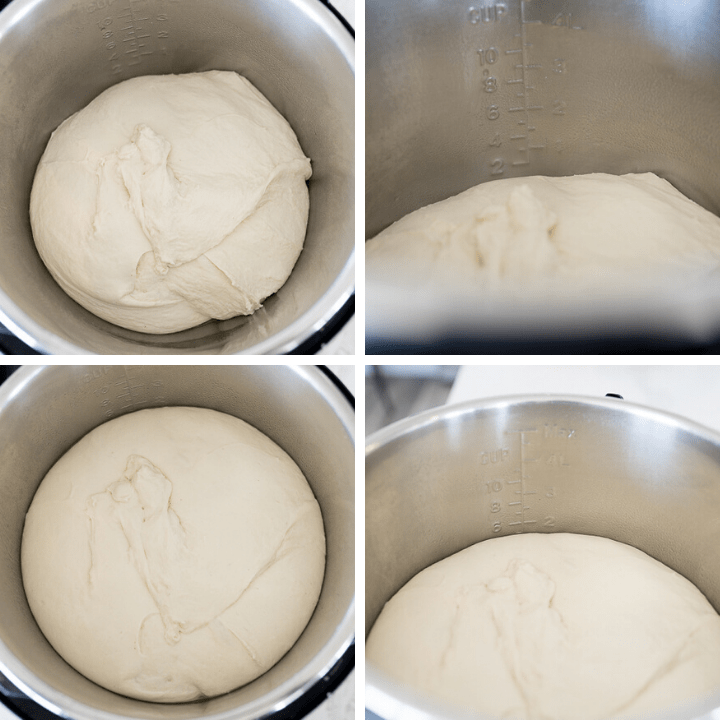
Now, let’s let this dough rise until triple! You can do this on the counter in about 2-3 hours time or we can do it in 30 minutes using our (well greased!) Instant Pot on the yogurt normal setting. (The Instant Pot yogurt button makes me geek out. I love it so much.) The top row of photos below is right when I put it into the Instant Pot, the bottom is 30 minutes later. Look at the measurement on the side of the pot!! Again, you can do this in a warm oven if you don’t have an Instant Pot. Details in the recipe card below.
From here, generously flour your counter top and gently roll the dough out of your Instant Pot/ rising bowl. Be careful not to squash all of those precious air bubbles!!
Shaping/ Cutting and Baking Ciabatta Rolls
Gently shape into a long rectangle. We will now cut the rectangle into 12 rolls using a pizza cutter. Don’t be shy with the flour, but be very gentle! Don’t destroy the bubs. 😉
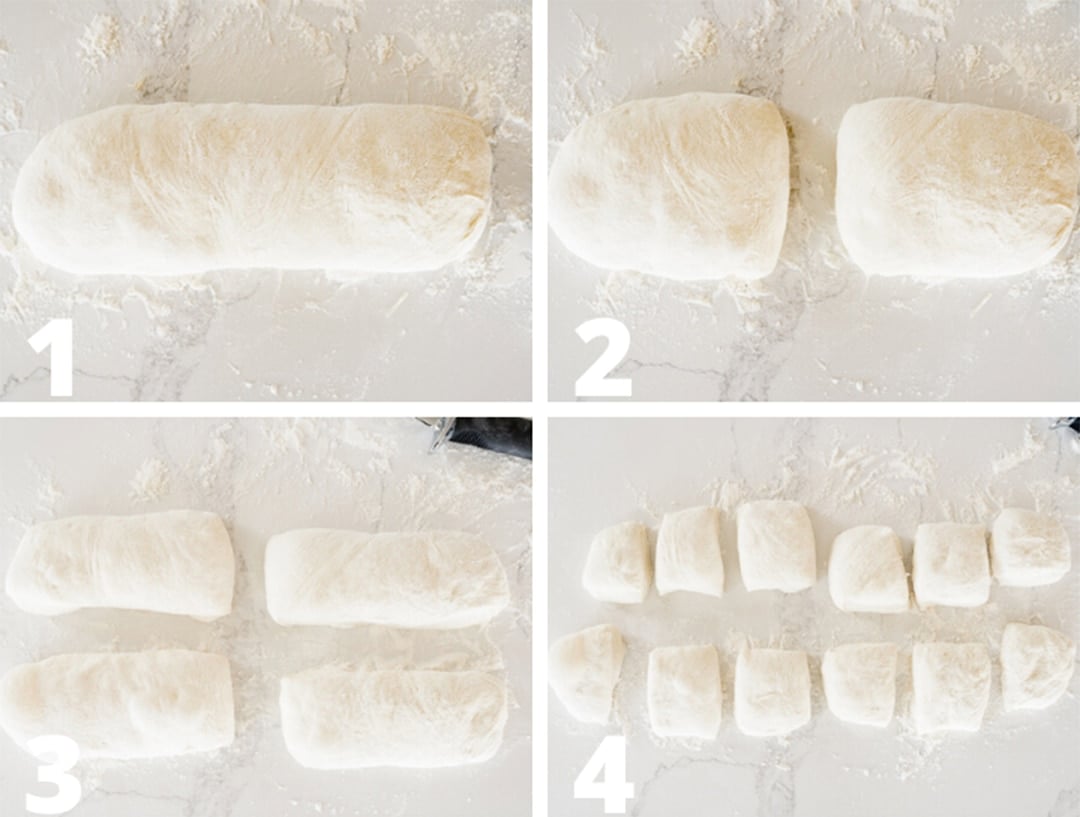
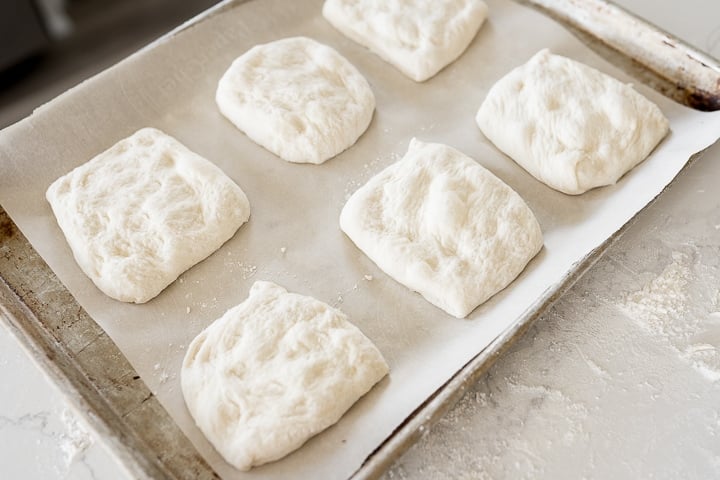
Arrange your rolls onto a parchment paper lined cookie sheet. Gently use your fingers to press down, flatten and shape the rolls into squares if they got a little out of shape while cutting. Again, be carful not to ruin all of the air bubbles! Gently!! The rolls will puff up quite a bit while baking.
Allow the rolls to rest while the oven preheats to 450°. Once the oven is heated, bake for 15-20 minutes or until the rolls are golden brown.
For the best texture and crumb, allow them to cool completely before using with a sandwich.
How to Store Ciabatta Rolls
Store in an airtight container for up to 2 days. They are best the day of, though. If you want to extend the life even longer, as soon as they are cool pop them into a freezer zip top bag and freeze until you are ready to use them.
What to eat with Ciabatta Rolls
I like to use them with French Dip Sandwiches, breakfast sandwiches, lunch panini’s, garlic bread or as a side to soup or stew.
More Must Try Bread Recipes
If you loved what you saw here, get more of it on Facebook, Instagram & Pinterest! I’d love to connect! Sign up for my weekly newsletter below to never miss a new recipe again!
[et_bloom_inline optin_id=”optin_2″]


Ciabatta Rolls Recipe
Ingredients
Biga
- 3/4 cup warm water
- 3/4 tsp active dry or instant yeast
- 1 cup all purpose flour
Ciabatta Dough
- biga
- 2 cups warm water
- 1 tsp active dry or instant yeast
- 4 cups all purpose flour
- 2 tsp salt

Instructions
Biga
- In the Instant Pot liner*, stir together the ingredients of the Biga. Stir vigorously for 30 seconds to 1 minute.
- Turn on the Instant Pot to Yogurt LOW, cover with a lid and let the Biga sit for 45 minutes. The Biga should be warm and bubbly at the end of the 45 minutes.
Ciabatta Dough
- In the bowl of a stand mixer, add the water, yeast and biga. Stir with a silicon spoon to break up the Biga.
- Add the flour and salt to the bowl, and knead using the dough hook. Start slowly until all of the flour is incorporated. Once all of the flour has been incorporated, bump the speed up to 4-6. The dough will be sticky and thin. At about the 10 minute mark, the dough should hold onto the hook and not stick to the sides of the bowl.
- Continue mixing for an additional 5 minutes after the dough holds onto the dough hook. The dough will be very smooth and have a shiny appearance. When the mixer stops, the dough will fall down to the bottom of the bowl.
- Clean out the Instant Pot liner and then spray with non stick spray. Place the dough into a well greased Instant Pot. Place a lid on top. Allow the dough to rise on Yogurt NORMAL* for 30 minutes.
- Carefully pour the dough out of the Instant Pot and onto a floured counter top.
- Shape the dough into a long rectangle and use a pizza cutter to cut the dough into 12 equal pieces.
- se your fingers to dimple and shape the rolls into a square.Allow the rolls to rest while the oven preheats to 450° and bake for 20 minutes.
- use your fingers to dimple and shape the rolls into a square.
- Allow the rolls to rest while the oven preheats to 450°.
- Bake for 15-20 mintues or until the rolls are golden brown.
- For best results, allow the rolls to cool prior to cutting and using for sandwiches.


I don’t have a mixer, can i mix/knead by hand?
Hi Chelsea- I wouldn’t suggest making this recipe by hand. This recipe requires a mixing at a high speed consistently for a long time.
It can be done by hand by stirring with a very sturdy spoon for longer, but it is exhausting!
I had to add quite a bit more flour to get it to clean the sides of the bowl. My poor KitchenAid was really worked (should’ve used the Bosch!)
The dough now looks lovely and they’re waiting to bake!
I hope you ended up loving them! The final flour measurement really does vary slightly thanks to climate and elevation!
I was really excited to try this recipe and the first step with the Instant Pot for 45 min on low, yogurt setting for 45 min was a flop. Not sure what did or did not happen but it looked like it did not do anything. And I have never used the bread attachment on my stand mixer but it clearly says I cannot use it on anything higher than speed 2. I cannot seem to find out why. Have tried to research it and do not know why or what would happen if I tried to use it on a higher speed. It is an older kitchen aid and it was given to me when my mother-in-law passed away. The bread attachment seems to be glass or ceramic. So I was wondering if it would break. Any way if you would do a video I think that would be really helpful. Thought it would be a great recipe but the first part did not work. Am very disappointed and was hoping to make the Instant Pot French Dip Sandwich but won’t have bread. Thanks for recipe wish I knew how to make it work.
I am sorry to hear you had such problems, Laura. I don’t know what mixer you have and with it being older, I wouldn’t suggest going against what the instructions say.
It’s possible your yeast was too old or had been improperly stored and so that was why the biga didn’t rise.
Not an expert, but I think the reason you aren’t supposed to use your stand mixer on dough at over the #2 setting is because it can overheat the motor. This is a much wetter dough than average though, so a “healthy” mixer may be able to handle it. But with a very old mixer, you have no way of knowing how close the motor is to being on its last legs, so unless you’re already thinking of getting a new one, I personally wouldn’t risk it. Or maybe I would risk it very gradually, pushing it up to 3 and checking the motor area frequently to make sure it’s not getting too hot.
I just made this with my stand mixer on a higher setting and I now know why it says not to. My stand mixer was bouncing around like crazy and ended up falling off the counter. It works at a higher speed but you’ll have to hold the stand mixer in place the whole time.
Thanks Iris, it is true you have to be careful with the stand mixer.
I have an Instant Pot without the yogurt button. Is there another setting that would also work using other models of Instant Pots?
No, unfortunately all other settings on the Instant Pot are too hot. There is a note in the recipe card about how you can use your oven as an alternative that might interest you.
I received an instant pot duo evo plus for Christmas and am very excited to start using it! I was especially excited to find this recipe. My son has sever food allergies so buying bread at the bakery is not an option. I can’t wait to try it! My question is about the yogurt setting. When I press the yogurt button it says custom, pasteurize and ferment. Which one should I select?
Thanks!
Hi Wendi- you’ll use the ferment setting. 🙂
When dough is ready, can I freeze half of it if I only want 6 rolls now?
I haven’t tried to freeze the dough prior to baking but I don’t see any reason why you couldn’t. If you give it a try, let me know how it goes!
Hi Karli
I don’t have a stand mixer so could I use a hand mixer (I live in a caravan and have no room for a stand mixer)?
Yes you can, although it will be difficult and you will get a good workout. 🙂
😆 Thank you, I will now try it and let you know.
When using the oven to prepare the Biga should I allow it to heat to 350; or set it to 350 and turn off after 5 minutes.
My oven has a bread proof setting that is 100 degrees F. Would that be warm enough?
The bread proofing setting should be warm enough!
I am so excited to try this recipe. I’ve never made ciabatta but love to eat it. Anyways I eat it with avocado and a poached egg. The holes fill up with the yolk and avocado- delicious!!!
Can’t wait to try it!!