This post may contain affiliate links. Please read our disclosure policy.
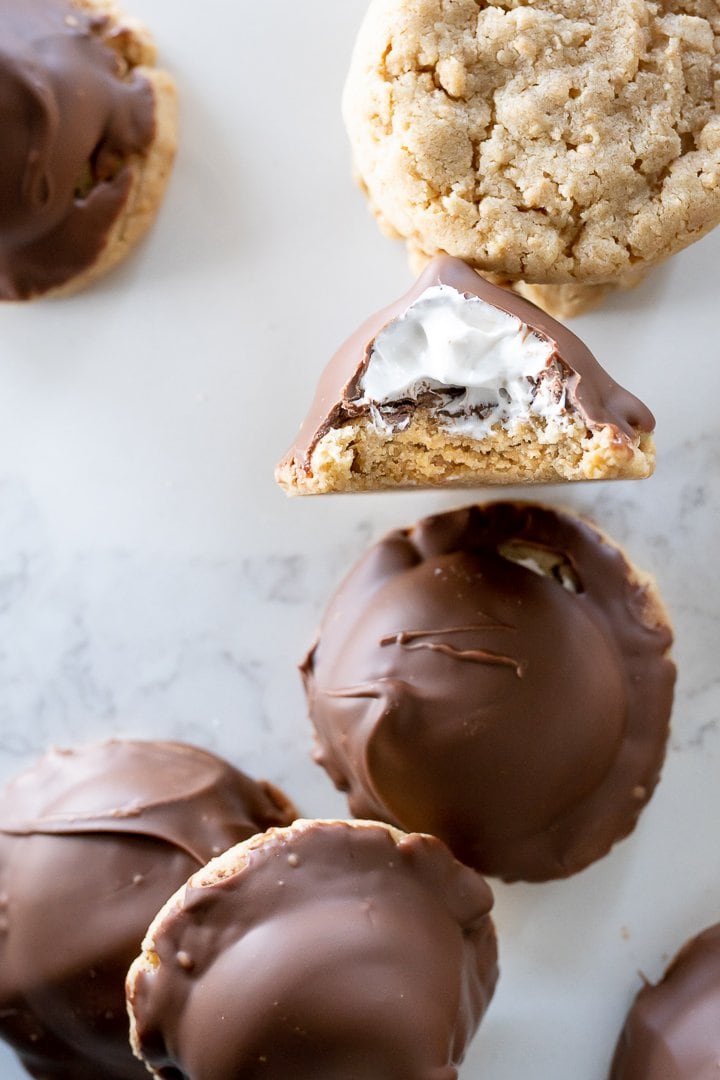
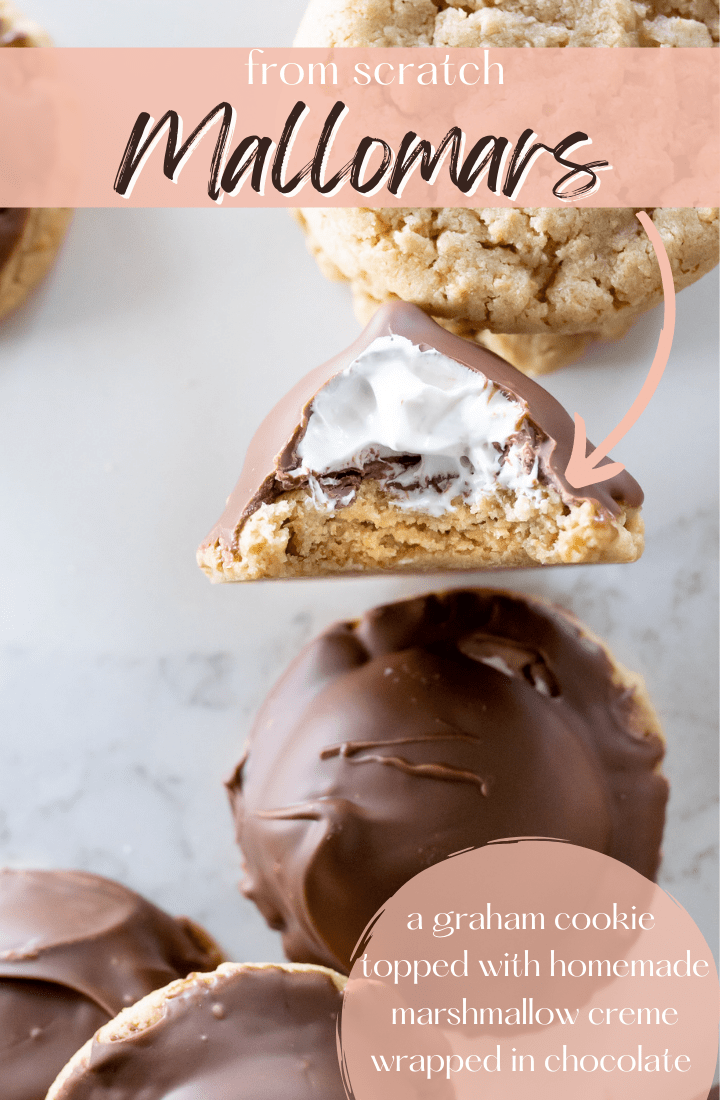
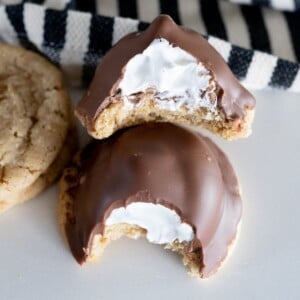
This Mallomars Recipe is a homemade version of the store-bought classic cookie. A from scratch soft and chewy graham cracker cookie topped with homemade marshmallow creme then dipped in smooth chocolate.
You will love these Mallomar Cookies
Mallomars have been on my list of cookies to make for about the last year and I am SO glad I finally got to them on my list! If you watch Gilmore Girls on repeat like I do, then you’ll understand my need to make my version of Mallomars.
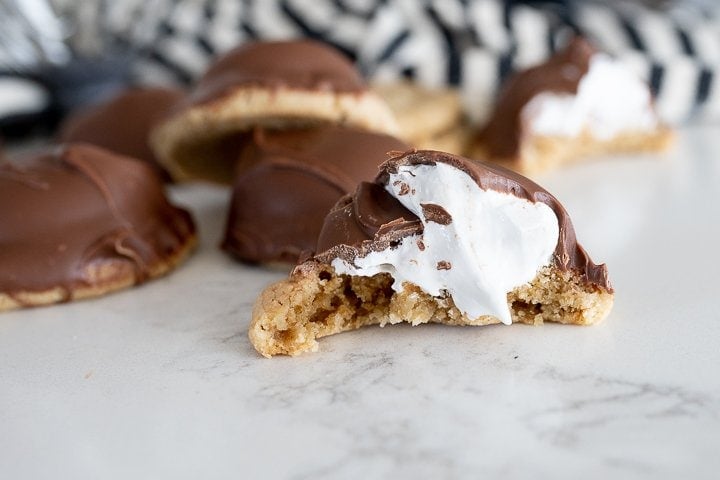
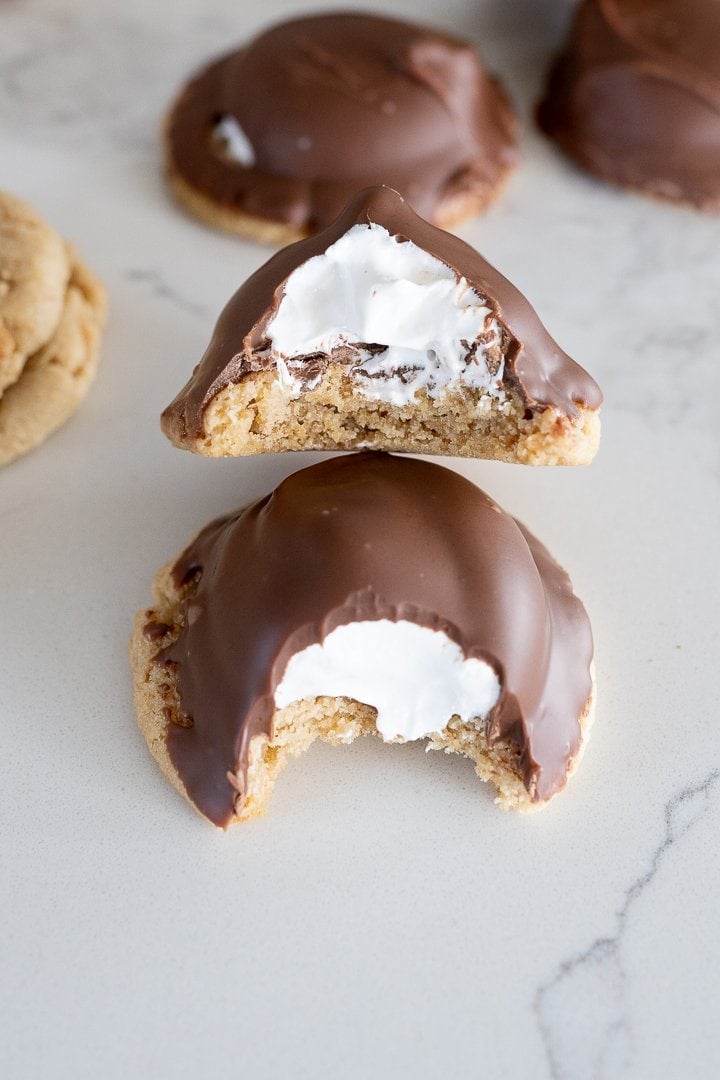
The combination of the chewy graham cracker based cookie (which, honestly, I could eat by itself day in and out), the fluffy marshmallow and crunch of the chocolate come together to make the most magically delicious cookie experience.
The different textures and flavors go together like Luke & Lorelei.. Rory & JESS. (yes, I said Jess. But I’m okay if you like Logan. If you’re team Dean however, we may have problems. 😉 )
What are Mallomars?
Mallomars are a brand of chocolate-coated marshmallow cookies that are sold in the United States. They are made up of a round graham cracker base, topped with a marshmallow filling, and coated in a thin layer of dark chocolate.
They are typically only sold during the fall at select retail stores.
Mallomars Cookies ingredients
These cookies are made up of 3 different parts- the Cookie Base, the homemade marshmallow creme and the chocolate topping. The specific ingredient amounts and instructions will be below in the printable recipe.
Graham Cracker Cookie Base Ingredients
- Butter– I always use salted butter. Make sure that it is softened or close to room temperature so it creams together with the sugars nicely.
- Granulated Sugar– Granulated sugar sweetens the cookie as well as gives it a slight crisp on the edges.
- Brown Sugar– Brown sugar serves as a sweetener and helps keep the center of the cookie nice and chewy.
- Egg– We just use one large egg here.
- Vanilla Extract– Use your favorite brand. I love to use Watkins, it can be found at Walmart.
- Flour– Just all purpose flour here, nothing fancy!
- Graham Crackers– Crushed! We will use one regular package of graham crackers crushed to a near powder.
- Baking Soda
- Baking Powder
- Salt
Homemade Marshmallow Creme Ingredients
- Egg Whites– Just the whites here!
- Granulated Sugar– the granulated sugar is mixed together with the egg whites at a high speed over heat to both whip the egg whites and temper the egg whites as the mixture gets hot enough to melt the sugar.
- Vanilla– for flavor. 🙂
Mallomar Chocolate Topping
- Chocolate Chips– Technically Mallomars that can be purchased at the store are covered in a rich dark chocolate. My personal preference is milk chocolate though. They are delicious either way. Use whatever chocolate you personally like best.
How to Make Mallomars Cookies
Graham Cracker Cookie Base
To make the cookie base, you’ll first preheat your oven to 350°. Next, mix together the butter and sugars, creaming together for about 2 minutes. Next, add in the egg and vanilla. Lastly, mix in the flour, graham cracker crumbs, leavening agents (baking soda and baking powder) and salt.
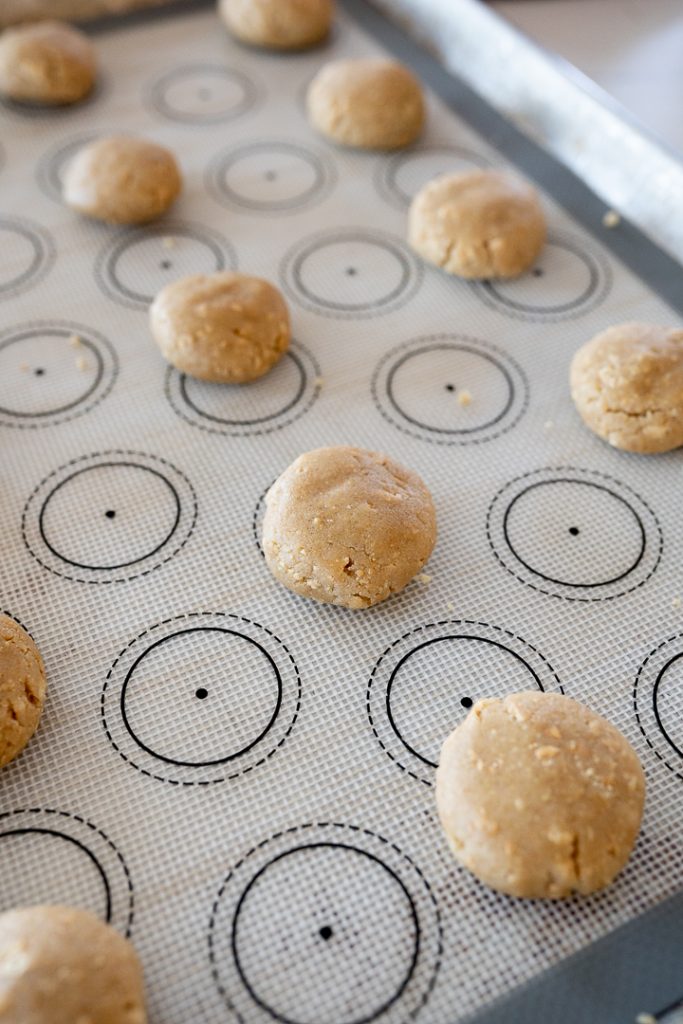
Scoop and roll the cookie dough using 1 1/2 tbsp portions (I used my #50 scoop). Roll into a ball and then flatten just slightly. They will spread slightly as they bake. Arrange the cookie dough onto a silicone sheet lined baking sheet- this batch will make around 35 small cookies.
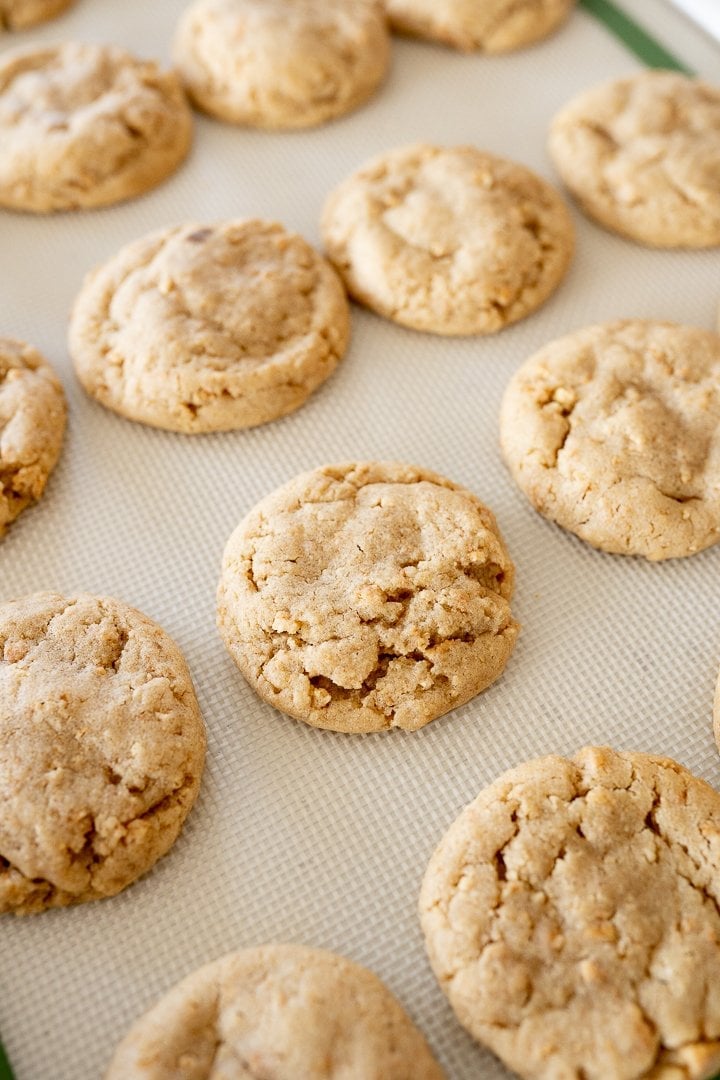
Bake at 350° for 9-11 minutes. You’ll know it is time to pull them out of the oven when they have spread slightly and the centers have puffed up and no longer look wet and glossy on top. You’ll want to pull them out before the edges get brown to make sure that the inside stays nice and chewy and soft.
Allow the cookies to cool on the pan for 10 minutes before transferring to a wire rack. Let the cookies cool completely before moving onto the homemade marshmallow creme.
How to make Homemade Marshmallow Creme
While the cookies are cooling make your homemade marshmallow cream. If you want to simplify the recipe you are welcome to use store bought marshmallow fuff. It won’t spread as easily as the homemade cream and it is a little more drippy and messy, but it is a quick and easy substitution.
To start, add your egg whites and granulated sugar into a heat safe bowl. I always use my metal stand mixer bowl, that way I don’t have to use two different bowls. If you have a stand mixer, use that bowl. If you only have an electric hand mixer, any heat safe bowl will work.
Now, take a small sauce pan and add about an inch or two of water in the bottom of the pan. Place the pan on the stove top over medium high heat until the water begins to simmer. Once the water begins to simmer, reduce the heat to medium low.
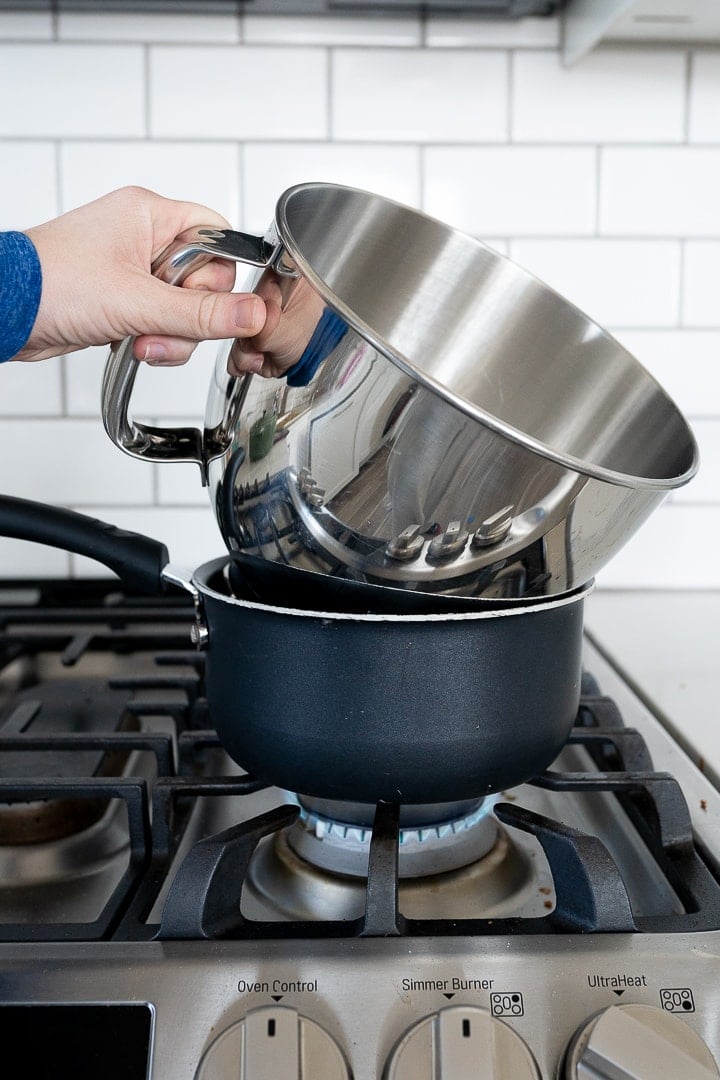
Hold the bowl of egg whites and sugar over the simmering water, whisking constantly. I like to use eye electric hand mixer for this to save my arm. 😉 You will constantly whisk until the mixture is white, creamy and fluffy. We want to make sure that all of the sugar has dissolved. To check this, remove the bowl from the heat and you can scoop a small amount onto a spoon, blow on it to cool it slightly and then rub the mixture in between your fingers. It shouldn’t feel grainy at all.
Once it isn’t grainy, remove from heat, add the vanilla and continue whisking until thick and glossy. If you have a stand mixer, just place the bowl into the mixer with the whisk attachment and let the mixer do the work!
Transfer the homemade marshmallow creme to a piping bag fit with a large round tip or a large zip top bag with the corner snipped. Pipe a dollop of the marshmallow creme onto each cookie.
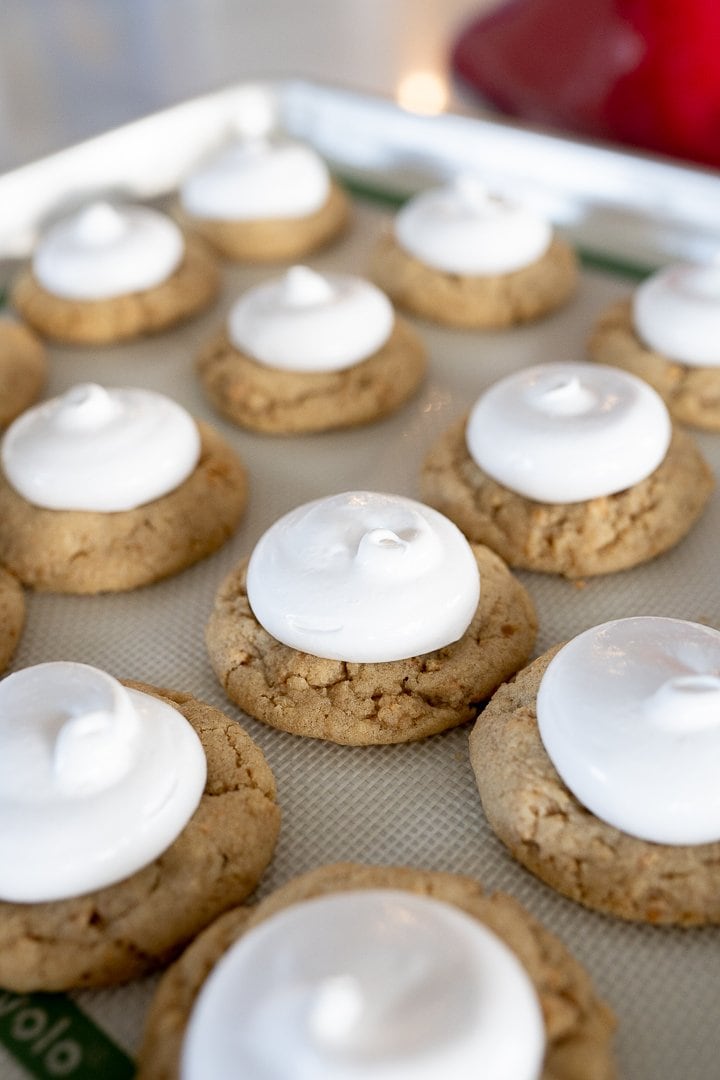
Listen, this is super important. The cookies need to go into the fridge for 30 minutes now! This will get that marshmallow creme nice and chilled so when we dip the cookie tops in melted chocolate they won’t slip and slide everywhere.
After they have sufficiently chilled, melt your chocolate chips in the microwave. Place the chips in a microwave safe bowl, and microwave for 30 seconds at a time, stirring at each 30 second mark until mostly melted. Stir until the remaining chips have melted.
Turn the cookies upside down and dip the top portion of the cookie to coat with chocolate. Return the cookie onto the silicone lined cookie sheet and repeat with remaining cookies.
Toss the cookies back into the fridge to set the chocolate quickly then serve!
Tips for dipping Mallomar Cookies
My best tip is to make sure that the mallomars are cold- chill them thoroughly. Next, if you don’t mind the cook of this, you could definitely cheat a little and just spoon some of the chocolate on top rather than dipping the cookies.
How to store Mallomars Cookies
Can Homemade Mallomars sit on the counter?
They can for up to about 5 hours. If you want to keep them longer than that, they need to be stored in the fridge until ready to serve. I put them into an air tight container or baggie and keep them in the fridge for up to 3 days. Just let the cookies sit at room temp for about 30 minutes prior to serving.
Can I freeze Homemade Mallomars?
While most of my cookie recipes can be frozen, I don’t recommend freezing these cookies because the homemade marshmallow creme does not freeze and thaw well.
Mallomars Recipe FAQs
Whippets are a Canadian version of a Mallomar with just a few differences. The most notable is that the chocolate on the outside is milk chocolate instead of dark.
Typically it is dark chocolate, but if you make your own you can choose whatever kind of chocolate is your favorite.
Mallomars are associated with New York because Nabisco historically had a manufacturing plant in New York City and the cookies were heavily marketed there.
More Cookie Recipes

Mallomar Cookies
Ingredients
Graham Cracker Cookie Base
- 3/4 cup salted butter, softened
- 1/3 cup granulated sugar
- 3/4 cup brown sugar
- 1 egg
- 1/2 tbsp vanilla extract
- 1 3/4 cup + 2 tbsp all purpose flour
- 1 1/2 cups crushed graham crackers , about 1 pkg crushed
- 1 tsp baking soda
- 1/2 tsp baking powder
- 1/2 tsp salt
Homemade Marshmallow Creme
- 3 egg whites
- 3/4 cup granulated sugar
- 1 1/2 tsp vanilla
Chocolate Topping
- 3 cups chocolate chips, melted

Instructions
Graham Cracker Cookie Base
- Preheat oven to 350°.
- Cream together the butter, granulated sugar and brown sugar.
- Add the egg and vanilla. Mix until light in color and creamy.
- Add in the dry ingredients (flour, crushed graham crackers, baking soda, baking powder and salt), mix into the dough. Mix until completely combined.
- Portion out the dough into 1 1/2 tbsp portions. Roll into a ball and arrange your silicone lined cookie sheet. Press down slightly on the cookie dough, flattening it just a bit.
- Bake at 350° for 9-11 minutes or until the cookies have spread and flattened slightly, the centers have puffed up and the centers of the cookies no longer look wet and glossy.
- Allow the cookies to cool on the pan for 10 minutes before moving to a wire rack. Cool completely before making the marshmallow creme.
Homemade Marshmallow Creme
- Place the egg whites and granulated sugar in a heat safe bowl (Use your meal stand mixer bowl, if you have a stand mixer).
- Place about 1 inch of water in the bottom of a small sauce pan. Place the sauce pan on the stove top and heat the water over medium high heat until it starts to simmer. Once the water starts to simmer, reduce the heat to medium low.
- Place the heat safe bowl with the egg whites and sugar above of the simmering water (not into the water, just above the water) and whisk continually with an electric hand mixer for about 3 minutes.
- The egg whites will become bright white, fluffy and creamy. Remove the bowl from the heat and check to see if all of the sugar has dissolved by rubbing a small amount in between your fingers. It should not feel grainy at all. If it still feels grainy, place the bowl back over the heat and continue whisking for another 30 seconds to a minute.
- Once the sugar has completely dissolved, remove from the heat and turn the burner off.
- If using a stand mixer, attach the bowl to the mixer and start mixing with the whisk attachment. If you don't have a stand mixer, just continue using your electric hand mixer.
- Add the vanilla extract and then turn the speed up as high as it will go and mix until thick, glossy peaks form.
Assembling the Cookies
- Add the homemade marshmallow creme to either a piping bag fit with a large round tip or to a gallon zip top bag with the corner clipped.
- Pipe a dollop of the marshmallow creme onto the top of each cookie.
- When all of the cookies have a dollop of marshmallow creme, place the cookies in the fridge to chill for 30 minutes.
- When the cookies have chilled for 30 minutes, melt your chocolate chips in the microwave. Do this by adding the chocolate chips to a microwave safe bowl and microwaving for 30 seconds at a time, stirring at each 30 second mark until the chocolate chips are melted smooth.
- Remove the cookies from the fridge and dip the marshmallow creme and top of the cookie into the chocolate, returning the cookie to the cookie sheet when it is covered. Repeat with remaining cookies.
- Place the cookies back in the fridge to help set the chocolate faster.
- Your cookies are ready to serve!The cookies can be kept at room temperature for about 5 hours, after that it is best to keep them refrigerated. Let the cookies stand at room temperature for 30 minutes prior to serving.


Hi! These tasted good, but they were difficult to dip in chocolate and get fully covered. I kept mine in the fridge for longer than 30 min before dipping. I found that when I dipped them in the chocolate, the marshmallow either came off into the chocolate and got mixed it, orthe chocolate simply didn’t cover the entire cookie like it’s intended to. I tried spooning the chocolate on top and that seemed to be less messier, but of course it didn’t cover the entire marshmallow part and cookie either. Not sure what I could do differently next time, but at least the flavor was good!
These cookies are soooo good! Thank you for this recipe. I’ve made them twice now. Your cookies are so pretty and I can’t wait to try some of the other recipes.
Had the same issue as Angie. As soon as they hit the warm chocolate, the marshmallow melted. Had to spoon the chocolate on top and spread. Still taste good, but was hoping they wouldn’t be so messy as I’m bringing them to a party. I’ve made a few of your other recipes without issue but this one needs a tweak! Maybe they should have been frozen instead?
Came out amazing I can’t wait to make them again they are perfect and the fluff wasn’t overly sweet it was the perfect addition to the cookie . I dipped them in milk chocolate!
These cookies are absolutely delicious! Everywhere I take them people beg for the recipe.
Coconut oil!
I found it was essential to add about a tbs ( or a few tsp at a time) of coconut oil to the chocolate to thin it out. Without it, the chocolate is thicker and grabs the marshmallow and pulls it off. With the oil, it’s thin enough where you can dunk and submerge without it grabbing onto the marshmallow.
Work quickly as it will thicken back up with time. Add more oil and reheat for 5 seconds if this happens.
Super tasty though! Love the Graham cracker cookie base- could eat that as is!
I would like an explanation for what the consistency of the marshmallow fluff should be. It was runnier than expected.