This post may contain affiliate links. Please read our disclosure policy.
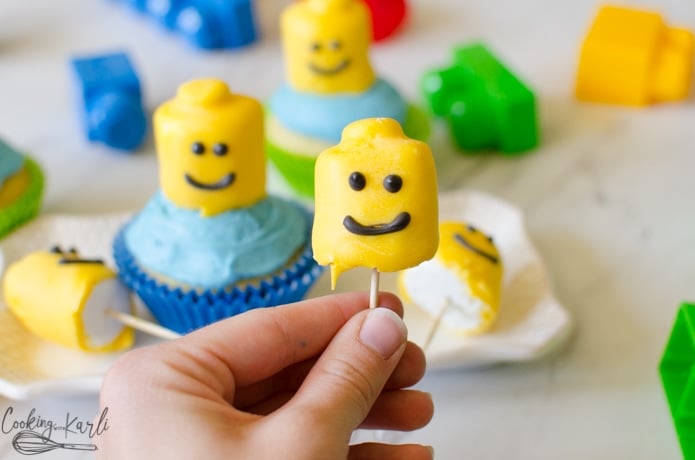
Lego Themed Birthday Cupcakes are super cute and so easy to make! The Lego Heads are made from Marshmallows and Chocolate Candy Melts and then are stuck into a cupcake using a toothpick. This is a fast and easy way to make themed birthday cupcakes.

Lego Themed Birthday Party
My little guy (who isn’t so little any more.. I am just in denial. It’s fine.) is having a Birthday soon! After much discussion on what kind of cake he wanted or even if we wanted cake at all.. (my daughter decided she wanted a sugar cookie cake for her birthday!!) we decided on these cute lego head cupcakes.
My son isn’t having a big party with friends, but after making these cupcakes it had my mind racing with all of the cute possibilities!
I mean, how cute would a mason jar full of legos be as some decor?? Lego building contests, watching the Lego movie, giving each person a Mini Figure as a party favor? The cuteness would be too much!
How to make Marshmallow Lego Head Cupcake Toppers
First you’ll need to gather the supplies:
- Large Marshmallows
- Mini Marshmallows
- Yellow Candy Melts
- Black Candy Melts or food marker
- Toothpicks
- Cooling Rack (usually used for cookies!)
- Cookie Sheet
- 4 small bowls, the same size
First you’ll need to prep the marshmallows a bit. Each of the mini marshmallows need to be cut in half and then ‘squeezed’ back into a round shape.
All of the large marshmallow need to be as round as possible. You’ll be able to ‘un-flatten’ them a bit if you roll the marshmallow in-between your hands like you would you were trying to make a snake.
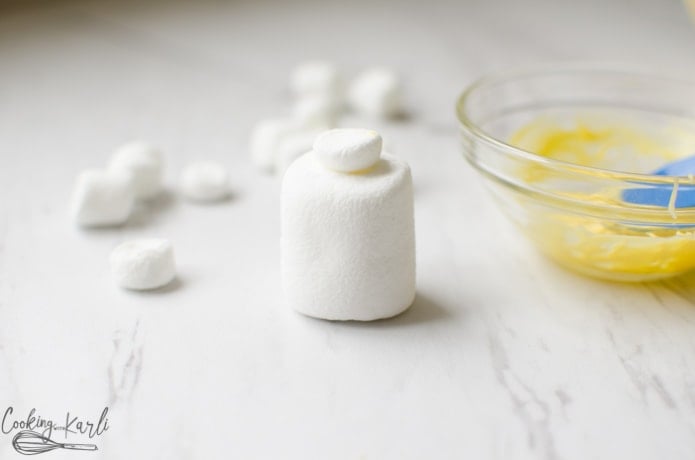
Next, you’ll melt the smallest amount of yellow chocolate. Using a small spoon, put a little chocolate on the bottom of a mini marshmallow half. Then using the chocolate as ‘glue’ place the mini marshmallows on the middle-top of the large marshmallow. Let dry completely before moving on to the next step.
Once the chocolate has completely dried and the two marshmallows are stuck together, push a toothpick into the bottom of the large marshmallow. You’ll want to push it in until you are only seeing about half of the toothpick poking out.
Now it is time to set up the drying station. You’ll want to prop the wire rack up on the small bowls with the cookie sheet underneath. (See picture below) This is so the toothpick can be hanging through the holes of the wire rack without hitting the bottom of the pan.
Melt a good amount of the yellow candy melts (I just eyeballed it, but I think I started with about 1 1/2 cups of melted candy melts). Melt in the microwave, once melted, transfer to a narrow but deep container. A small mason jar or glass cup would be perfect.
Now it is time to give these little lego heads a dunk in some chocolate. Holding onto the toothpick, completely coat the marshmallow in the yellow candy melts.
This next part is honestly the trickiest part, but don’t stress over it! Now that the marshmallow is coated in yellow chocolate, you’ll need it to dry on the wire rack that is propped up on the bowls.
Use a second toothpick to help stabilize the marshmallow when you drop it through the wire rack hole. Use the toothpick to stand it back up/ situate it. The chocolate is very liquidy and forgiving, any marks made from the toothpick will be covered and not visible once dry.
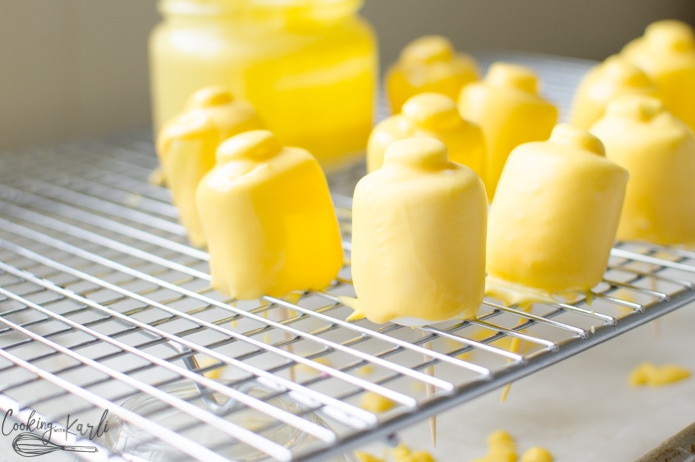
You can see in the bottom lefthand corner my little glass bowl sitting upside down supporting the wire rack. I put parchment paper in my cookie sheet to help make cleanup a little easier.
Once dry, use either the black candy melts with a small piping tip or the food markers to give the lego heads a face!!
They are now ready to top your favorite cupcake!! I will be posting my favorite Vanilla Cupcake Recipe within the next few days, so keep your eyes peeled!!
This is the Buttercream I used- I use this on cupcakes, sugar cookies, cinnamon rolls.. pretty much everything. It is 100% delicious.
PIN ME!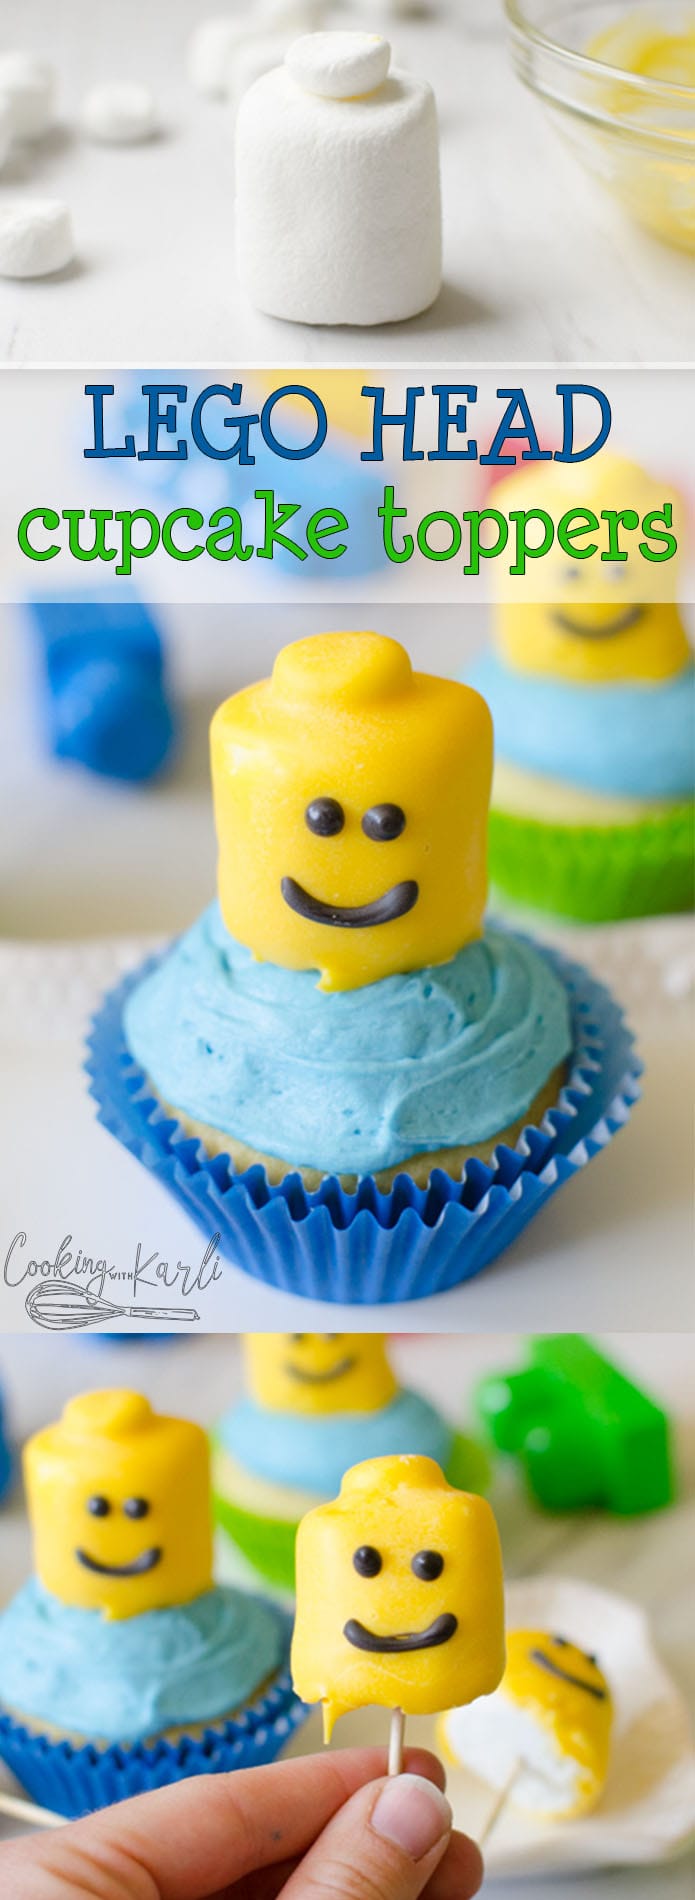
Note: I saw a video floating around facebook a while back that showed how to make marshmallow ‘lolly pops’ using marshmallows. I thought it was adorable. It has obviously stuck with me, although the original source hasn’t. If you know who the original Marshmallow Lego Header is, let me know! I’d love to give credit for this fabulous idea!
[et_bloom_inline optin_id=”optin_2″]


Hi, I was just wondering how many days in advance could I make these? And would I store them in the fridge? Also, do you have any tips on how you got the chocolate to look so smooth?
Hi Sandra! You could make these 2 or 3 days in advance. Storing them in the fridge would not be necessary, but I don’t see it hurting anything either. When you Dip the marshmallow, make sure the chocolate is extremely melted. This will help the chocolate smooth out as the chocolate hardens and dries. I also melted the chocolate in a bowl but then poured it into a small mason jar so I would be able to dip the marshmallow in one motion. I hope that makes sense!