This post may contain affiliate links. Please read our disclosure policy.
A waffle cone taco shell filled with vanilla ice cream and topped with chocolate and nuts. This dessert taco will help you take Taco Tuesday to the next level!
Dessert Tacos
Choco Tacos are the thing that childhood ice cream truck dreams are made of! Nothing screams summer more than one of these bad boys on a warm summer evening.
But imagine your next Cinco De Mayo party, or even Taco Tuesday with homemade dessert tacos! Or even better, a dessert taco bar!
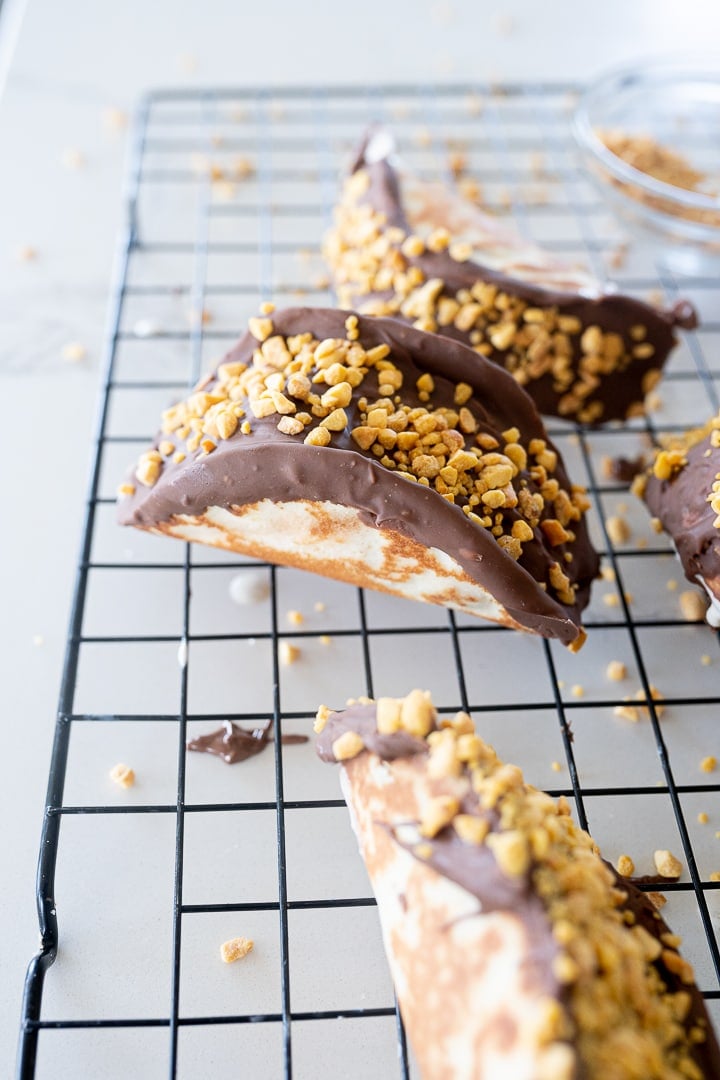
A classic Choco Taco has vanilla ice cream topped with chocolate and peanuts, but there are dozens of different variations. So feel free to make your own version of this classic dessert, all on top of a perfectly fresh sugar cone shell made on your very own stove top!
Ingredients for Dessert Tacos
For the Sugar Cone Taco Shells
- Egg White– Just the white here, no need for that yolk!
- Sugar– granulated sugar.
- Whole Milk– You can use 2% or whatever you have on hand in a pinch if you don’t have whole milk.
- Vanilla– This will give a homey flavor to our sugar cone taco shells.
- Salt
- Flour– All purpose flour works great! Nothing fancy here.
- Butter– the butter will need to be melted! I always use salted butter.
For the Toppings
- Vanilla Ice Cream– Classic Choco Taco is vanilla ice cream swirled with hot fudge, but you could use any variety of ice cream here.
- Hot Fudge– The hot fudge is to layer with the vanilla ice cream. You can eliminate this ingredient or step if you use fudge ripple ice cream.
- Milk Chocolate Chips– This is what is on top of actual choco tacos, but if you are a dark chocolate fan, feel free to use that instead!
- Coconut Oil– This will help thin the chocolate topping out which will make it easier to eat and help it harden back up quickly.
- Peanuts
- Sprinkles Candies or Any Other Toppings
Equipment Needed
Normally you would need a waffle cone maker to make the taco shells, but, as most people don’t have a waffle cone maker on hand, I am going to teach you how to make these on your stovetop.
You will, however, want 2-3 nonstick skillets. The skillet needs to be cold every time you start a new sugar cone or else the cone will burn. The process is so much quicker if you have a few skillets to cycle through.
How to Make Choco Tacos
In a small bowl, whisk the egg white, sugar, vanilla extract and milk together until well combined.
Add the salt, flour and melted butter and mix again until smooth.
Lightly spray the non stick skillet and pour 1 1/2 Tbs of batter onto the center of the cold pan.
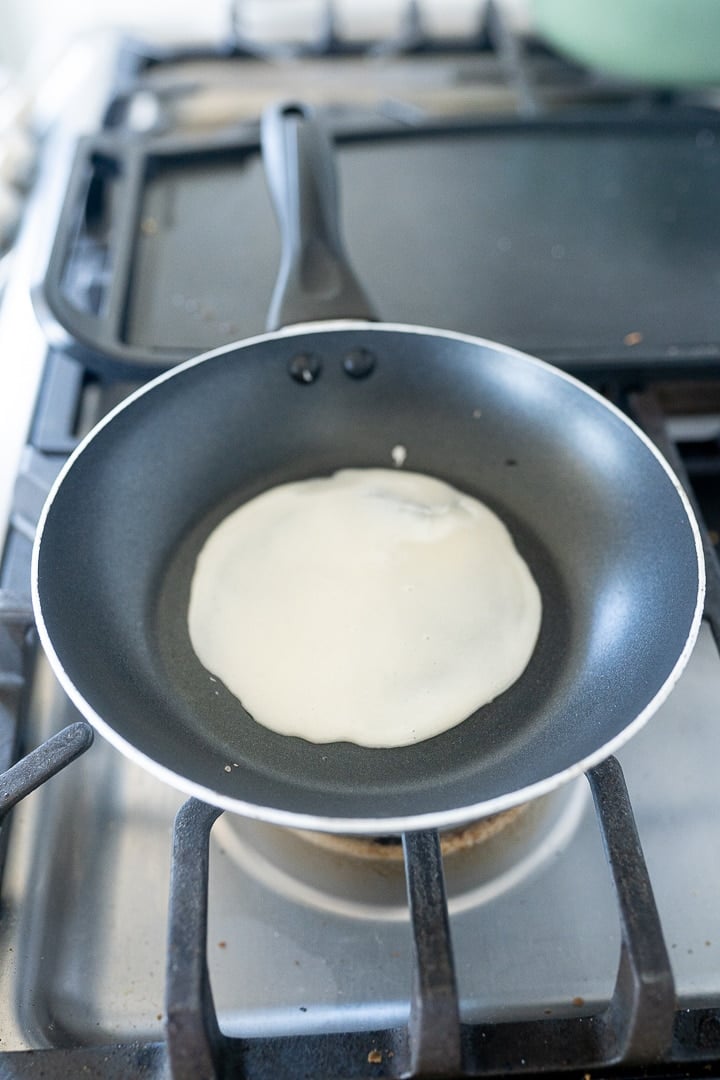
Place the pan over low heat and cook for 4-5 minutes or until the bottom of the cone in golden and the top is set. Flip the cone like a pancake and cook for an additional minute.
Remove the pan from the heat and drape the cone over 2 bars of a cookie cooling sheet to shape and cool the cone. If you don’t have a cooling sheet you can use a thick book or a wooden spoon, anything to help you achieve that classic taco shape.
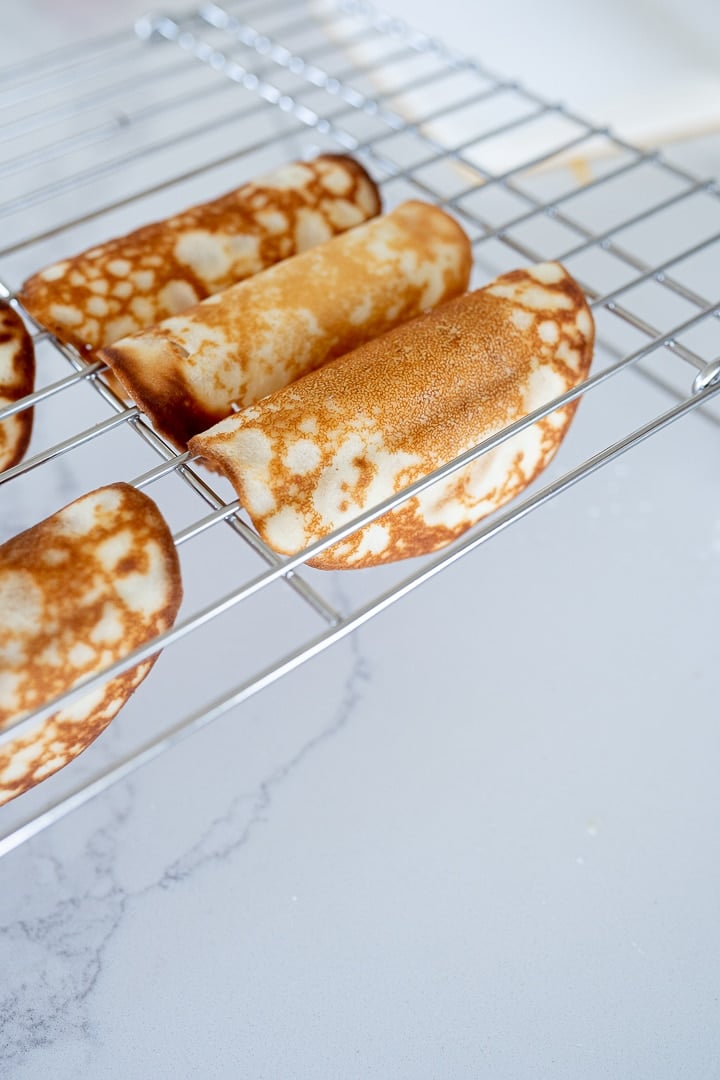
The cone will begin to harden quickly, so you will want to work fast. It will also be super hot, so use a dish towel or some other barrier to keep from burning your hands.
Repeat the process in a cold skillet with the remaining cone batter.
Assembling the Choco Tacos
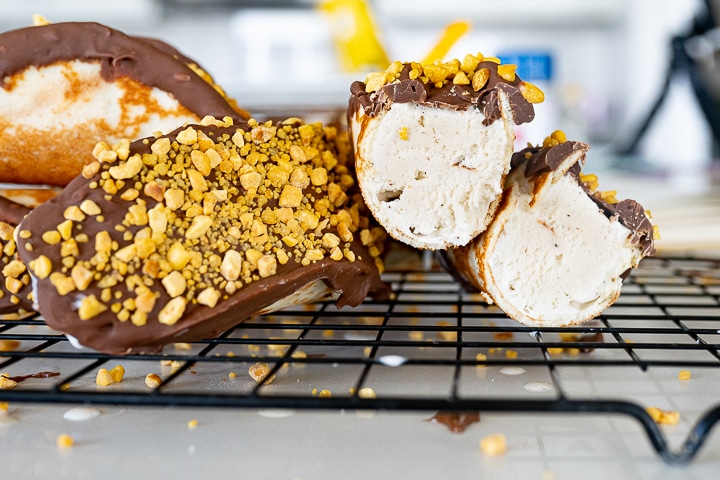
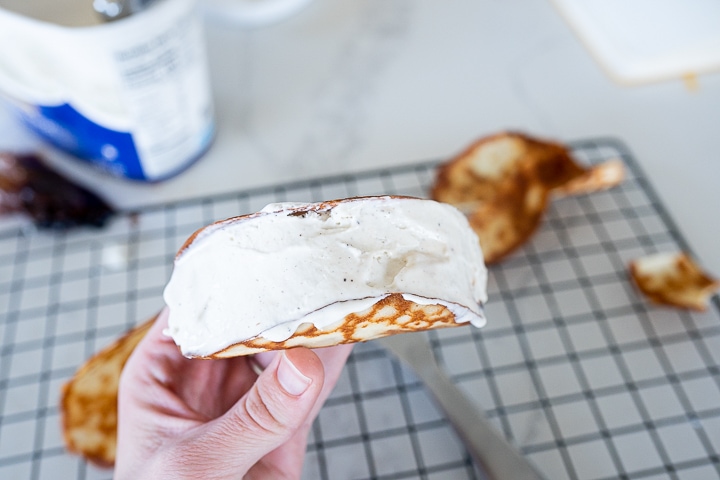
To assemble the Coco Tacos fill the cones with ice cream and fudge. Start by layering with a little bit of ice cream and a small layer of fudge. Continue layering until the taco shell is filled. This process is a little bit easier if the ice cream is slightly softened.
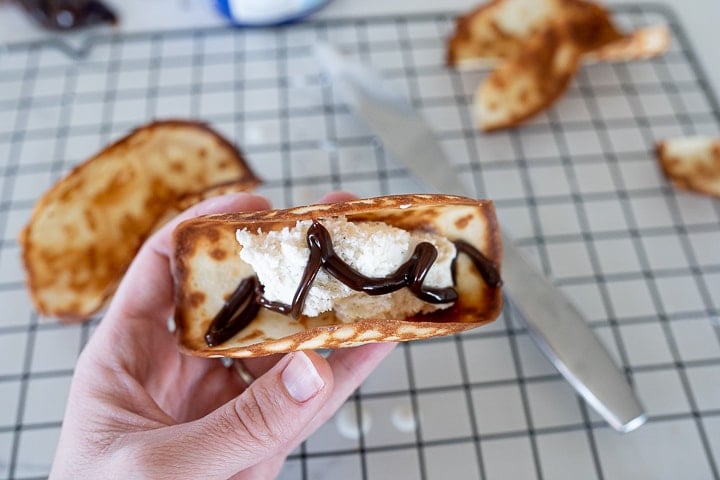
When the shell is filled, place the taco in the freezer on a cookie sheet, adding tacos to your sheet as you finish filling them. Use a knife to smooth the ice cream.
Allow the dessert tacos to freeze for a solid 30 minutes before moving on to the next step.
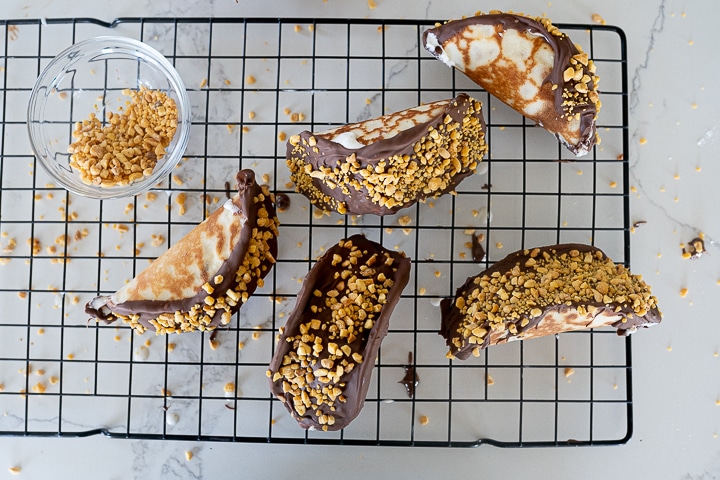
Melt the chocolate chips in the microwave at 30 second intervals, stirring between each 30 seconds until the chocolate is melted and smooth. Stir in a little coconut oil to help thin the chocolate out a bit.
Dip the tops of the tacos in the chocolate, starting at one edge and rolling over the top of the taco until the ice cream in completely incased in chocolate. Sprinkle with peanuts or any other topping you like.
Repeat with the remaining tacos and store in the freezer.
What are other dessert taco variations?
The fun thing about this dessert is the ability to play with flavors, or even create a taco bar and let everyone make their own!
Other Flavor Ideas:
- Vanilla Ice Cream, Strawberries and Nutella
- Mint Chocolate Chip Ice Cream, Chocolate and Oreo
- Vanilla Ice Cream with Caramel Swirl, Chocolate and Heath Bar
- Vanilla Ice Cream, Chocolate and Oreos
- Chocolate Ice Cream, Peanut Butter Cups and Whipped Cream
- Vanilla Ice Cream, Chocolate and Reese’s Pieces
- Vanilla Ice Cream, Chocolate and Bananas

More Dessert Recipes


Choco Taco Recipe
Equipment
- 2-3 non-stick skillets
Ingredients
Sugar Cone Taco Shells
- 1 large egg white
- 1/4 cup granulated sugar
- 1 1/2 tbsp whole milk
- 1/2 tsp vanilla extract
- 1 pinch salt
- 1/3 cup all purpose flour
- 1 tbsp butter, melted
Toppings
- 6 cups vanilla ice cream
- 1/3 cup hot fudge sauce
- 1 1/2 cups milk chocolate chips
- 1 tsp coconut oil
- 1 cup chopped peanuts/sprinkles/other toppings

Instructions
Sugar Cone Taco Shells
- In a small bowl, whisk together the egg white, granulated sugar, milk and vanilla extract until well combined.
- Add the pinch of salt, flour and melted butter and whisk until smooth.
- Lightly spray a non-stick skillet with non-stick spray and then scoop 1 1/2 tbsp of batter onto the center of the cold pan.
- Use an off-set spatula or the back of a metal spoon to spread the batter out into a 4 inch circle.
- Place the pan over low heat and cook for 4-5 minutes, or until the bottom is golden brown and then top is set.
- Flip the cone like a pancake and continue to cook for about another minute, until the other side is golden brown.
- Remove the pan from the heat and immediately place the cone into the slots of a cookie cooling rack, draping it over 2 bars to create the taco shell. You can also use the binding of a thick book, an empty paper towel roll, the handle of a wooden spoon etc to achieve the same shape. The cone will start to harden almost immediately, so you need to work fast. The cone will also be very hot, so use a clean towel as a barrier between your hands and the cone.
- Repeat the above steps in a new, cold skillet. Continue rotating skillets and only using cooled down skillets to make the next sugar cone shells. Repeat until all of the batter has been used and all of the sugar cone shells are made.
Assembling the Choco Tacos
- To assemble the Choco Tacos, fill the bottom of the shell with vanilla ice cream.
- Drizzle a little hot fudge onto the vanilla ice cream.
- Fill the rest of the taco shell with vanilla ice cream.
- Use a knife to smooth the ice cream level with the taco shell.
- Place on a cookie sheet and place them in the freezer immediately after filling the shell with ice cream, opening the freezer and adding each new choco taco as it is filled.
- Allow all of the choco tacos to freeze for 30 minutes before moving on.
- Melt the chocolate chips in the microwave, for 30 second intervals, stirring at each 30 second mark, until the chocolate is melted.
- Stir the coconut oil into the melted chocolate.
- Dip and roll the tops of the choco tacos into the melted chocolate encasing the ice cream in chocolate.
- Immediately sprinkle with chopped peanuts or any other toppings your might like.
- Repeat with the remaining tacos.
- Store in the freezer.