This post may contain affiliate links. Please read our disclosure policy.
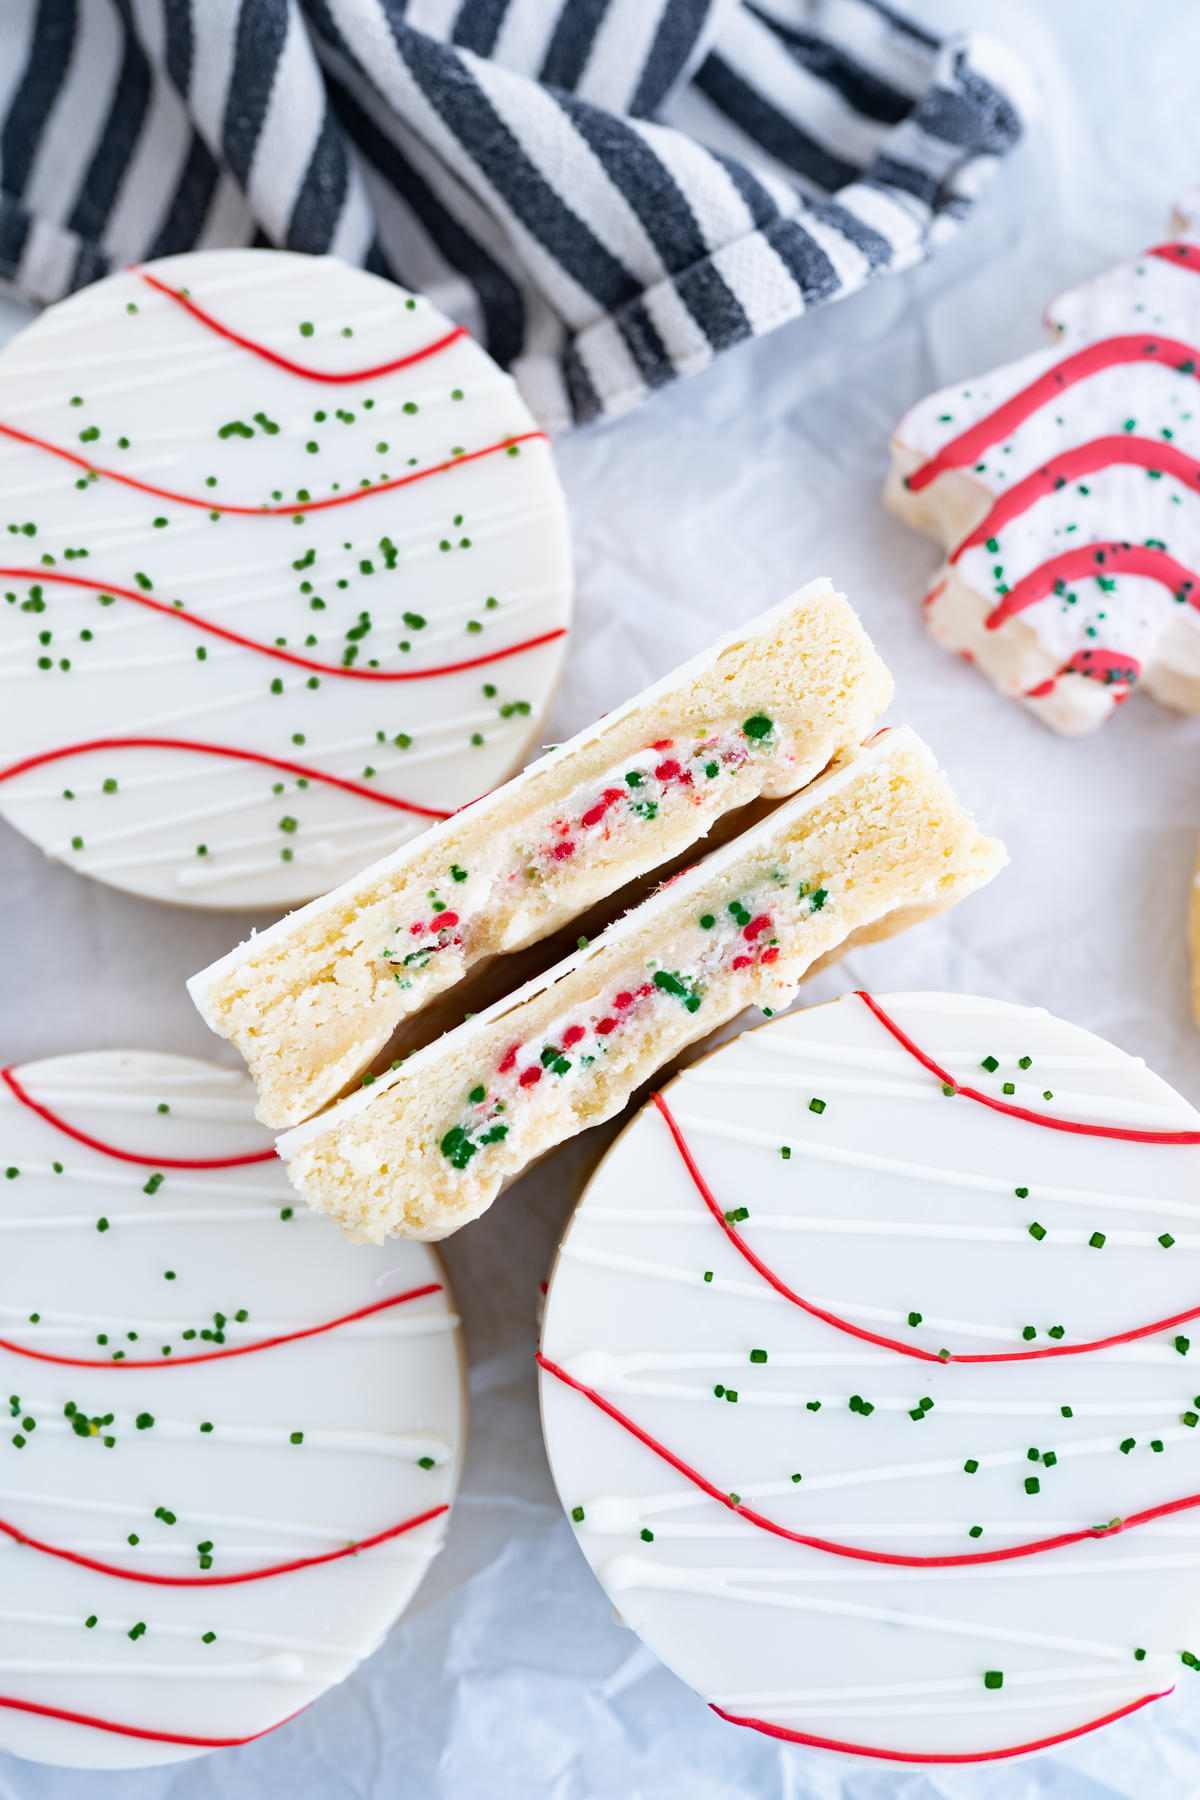
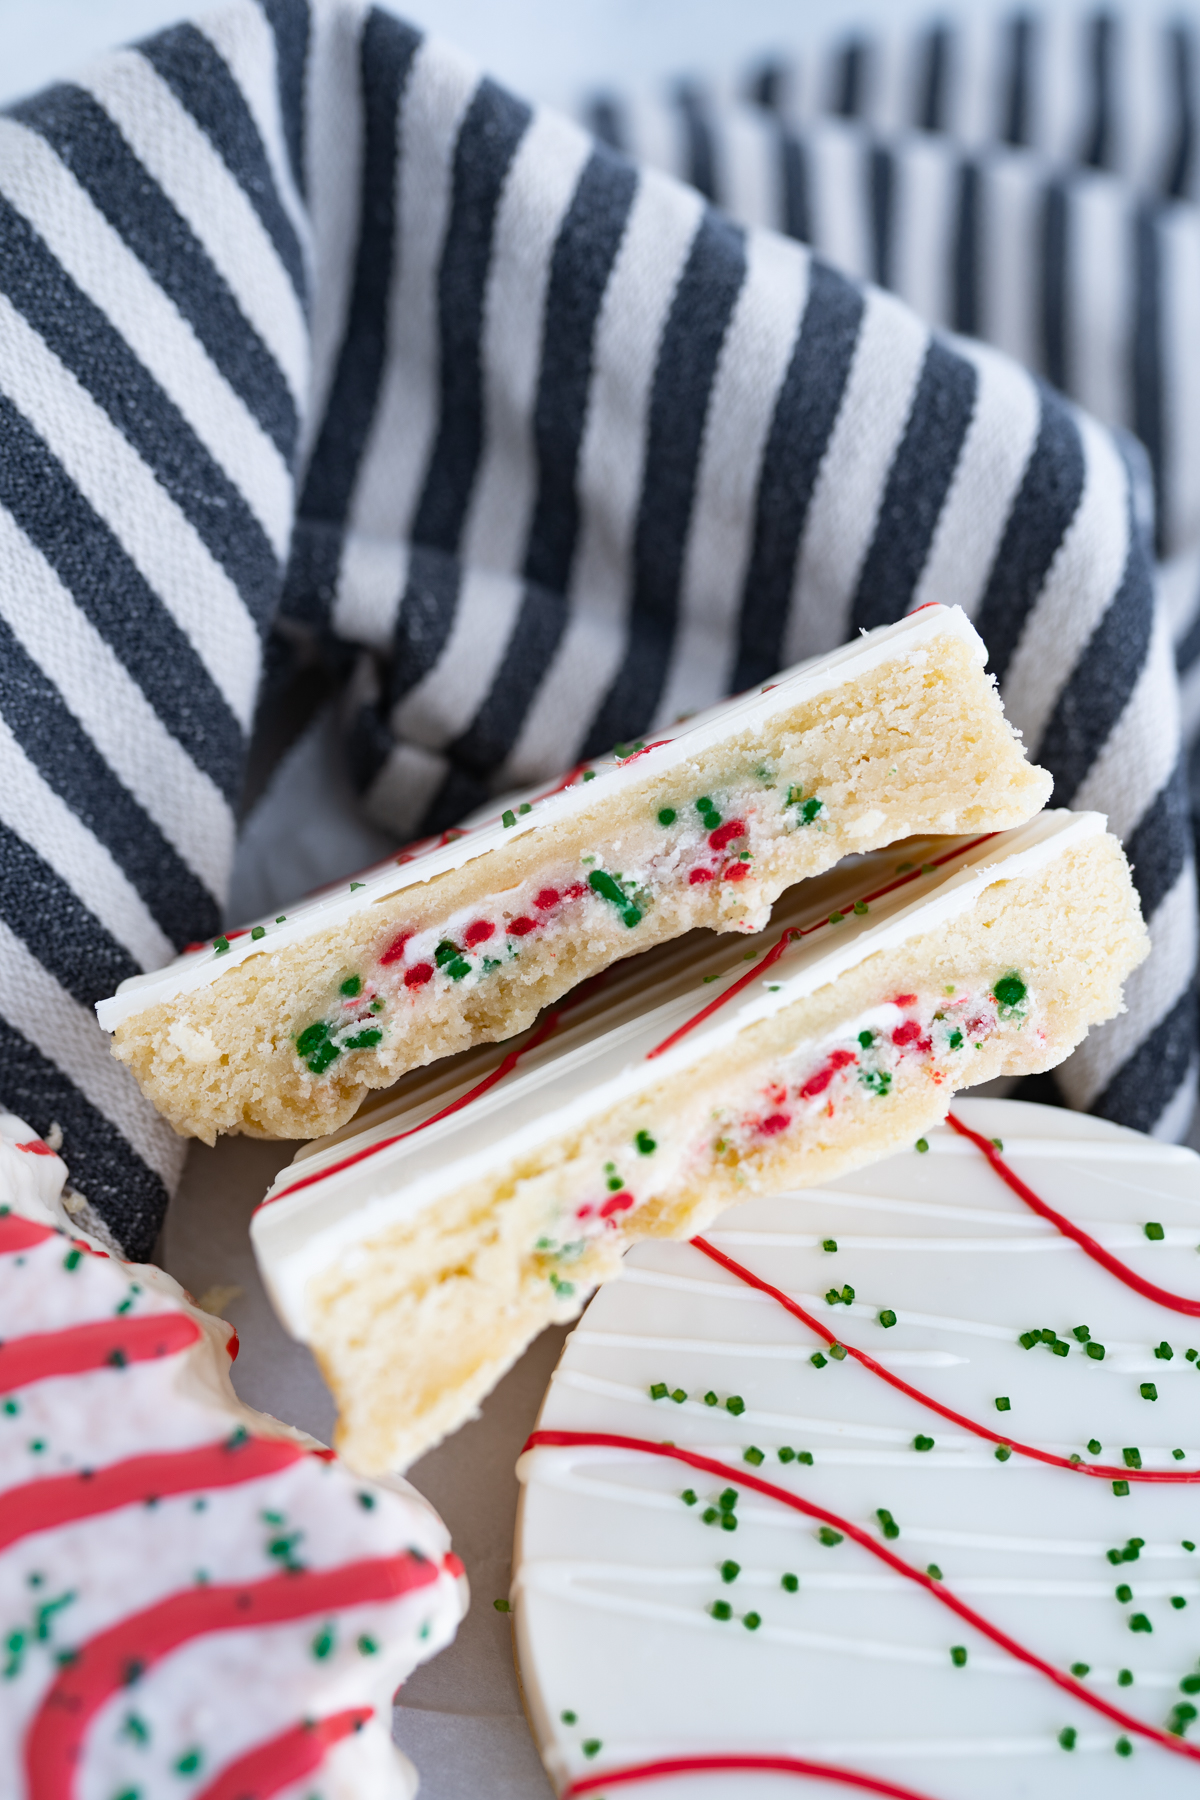
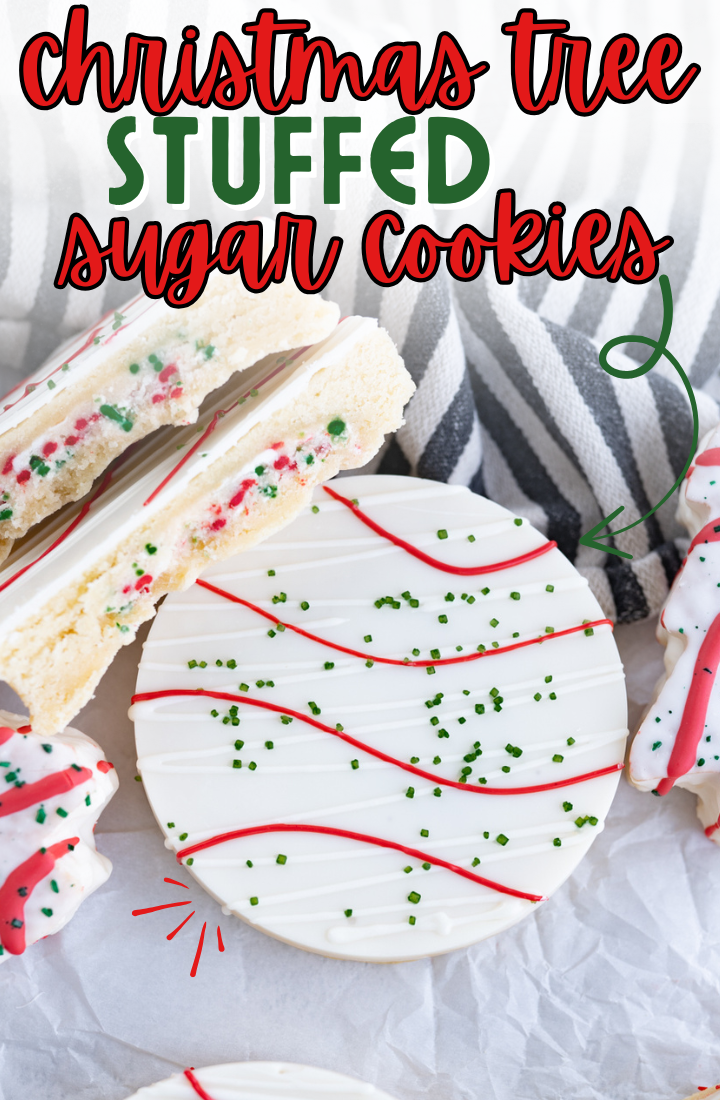
A soft, buttery sugar cookie that is stuffed with Christmas Tree Cake buttercream and decorated to look like Little Debbie’s iconic trees. It doesn’t get more Christmassy than this!
Christmas Tree Cake Cookie
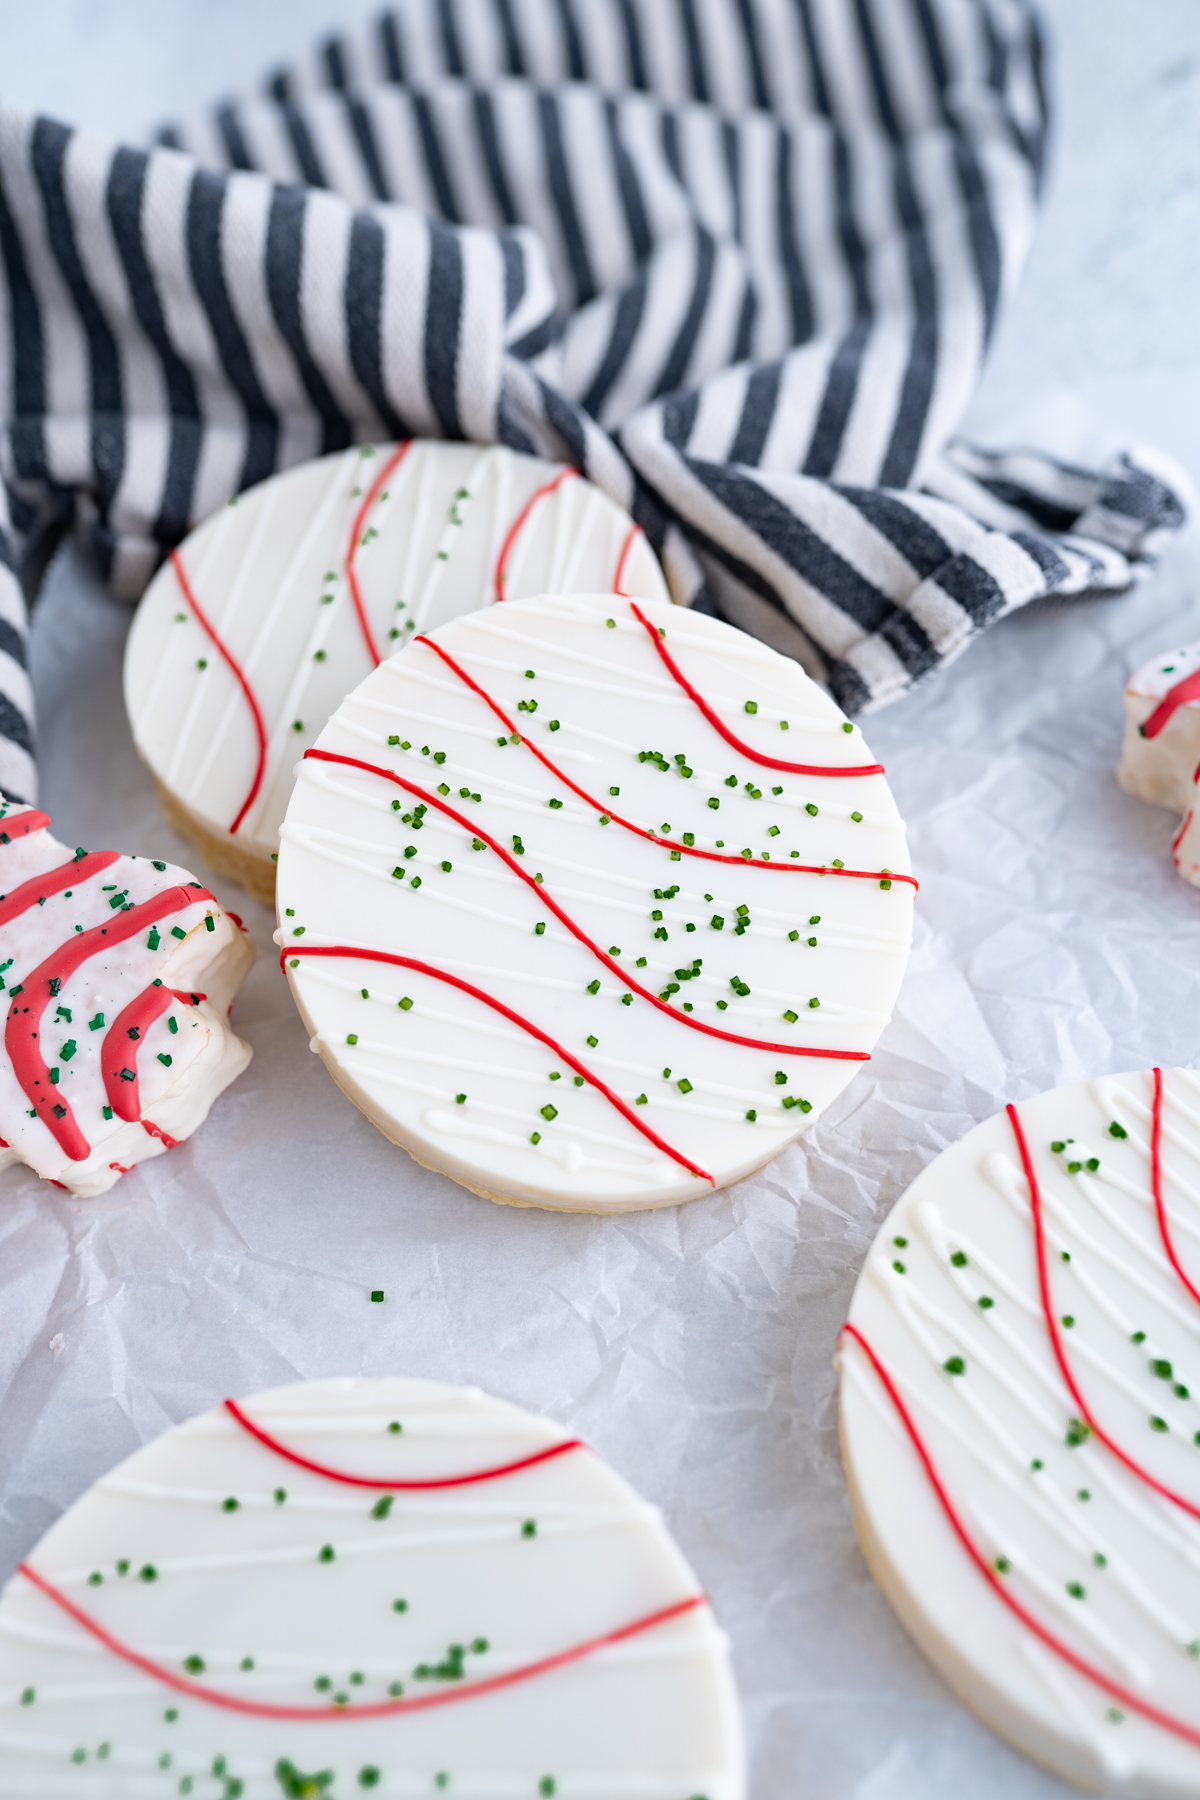
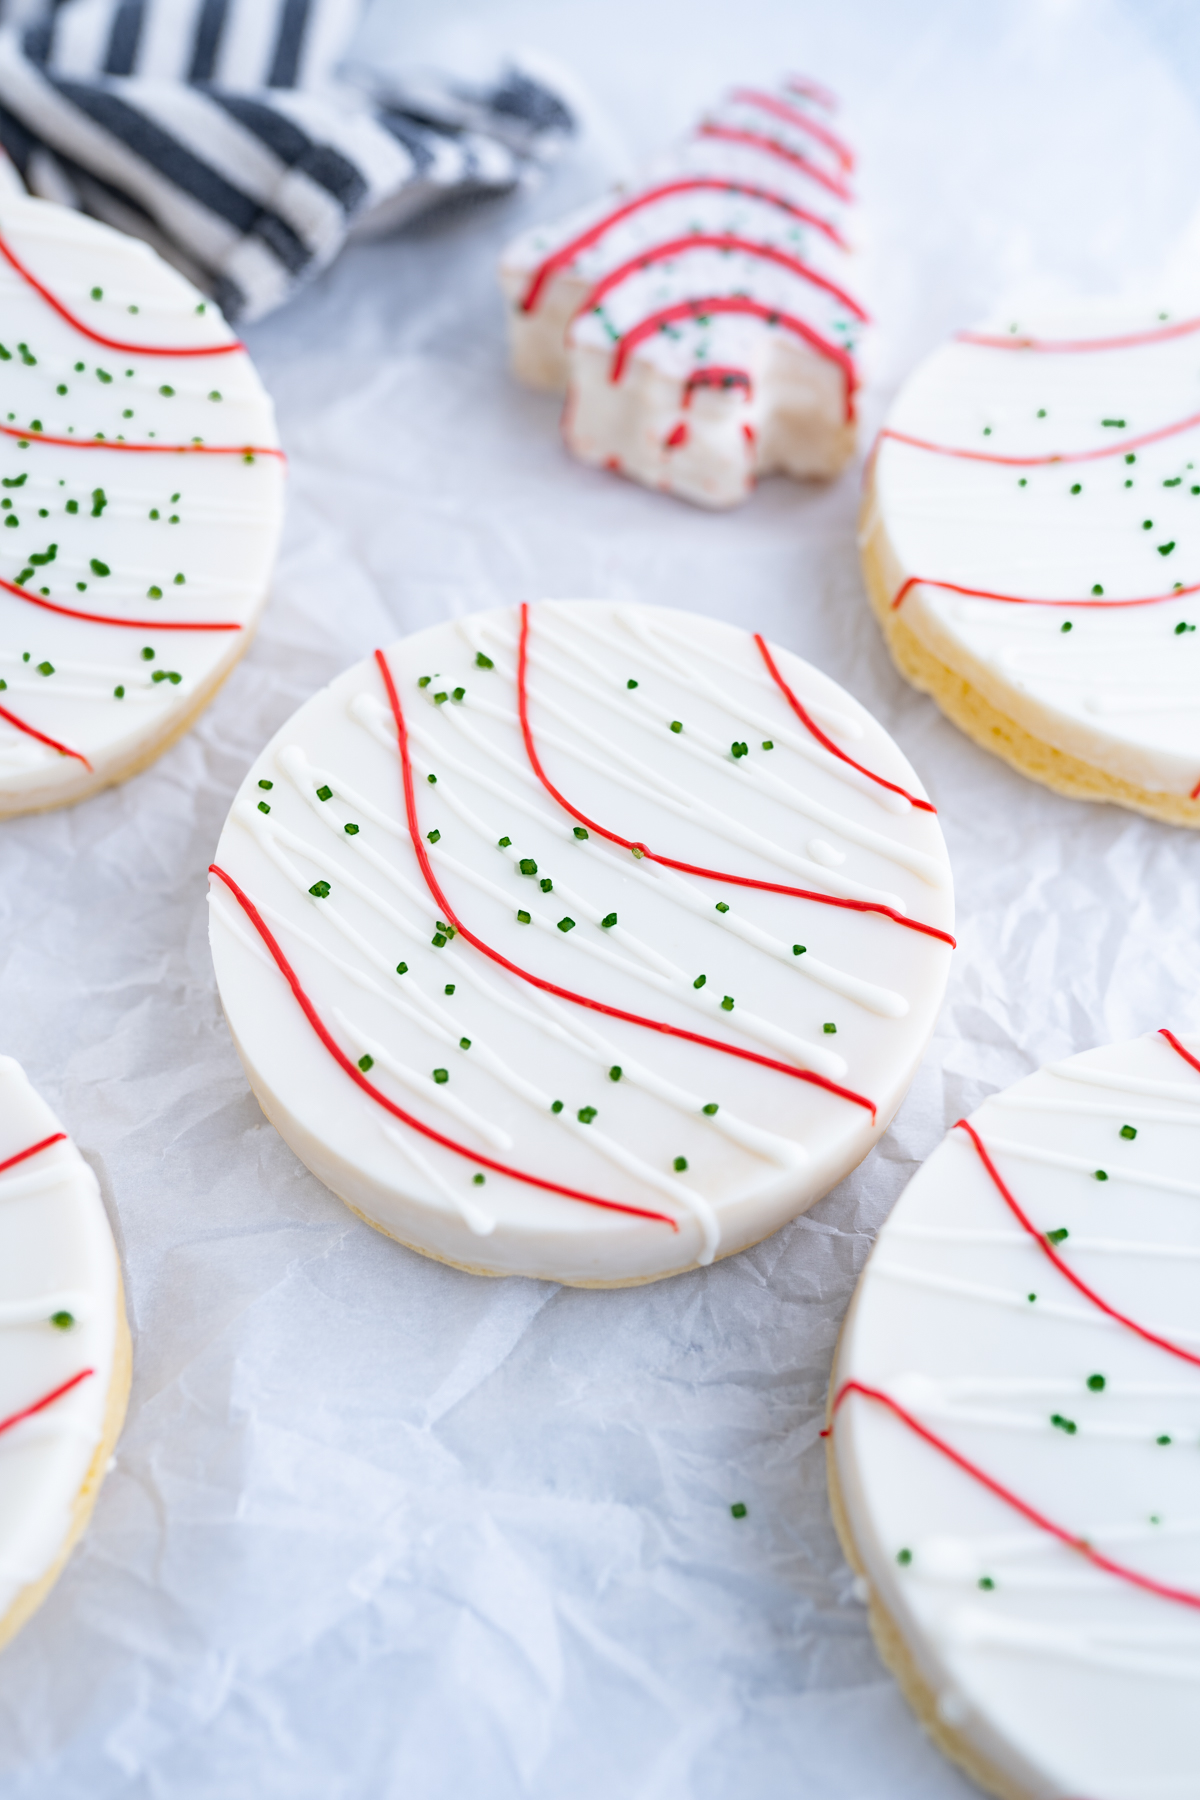
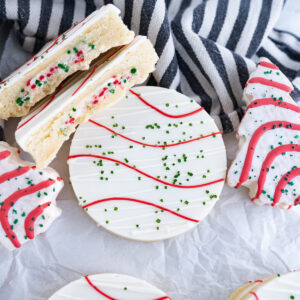
I don’t want to speak for Debbie, but honestly? She would be more than a little proud of these. These Christmas Tree Cake Cookies take a soft, buttery sugar cookie and fill it with Christmas Tree Cake Buttercream. As in, the buttercream literally has mashed up Christmas Tree Cakes in it. And woof, it’s so freaking good. And, in case it wasn’t obvious, the cookie is then frosted with an iconic white chocolate coating, red trim and green sanding sugars to look like the treat we all know and love. It’s truly the ultimate Christmas treat.
Pro tip: These cookies are great when they’re made, but they’re AMAZING when the flavors have had time to meld. If you’re making these for an event, I recommend making them the day before.
And just in case giant cookies aren’t your thing, I also made these into a Mini Christmas Tree Cake Cookie.
Ingredients you’ll need to make Christmas Tree Cake Cookies
*Consider this your quick reference list. Exact quantities and instructions can be found in the recipe card at the bottom of this post.
Sugar Cookie:
- Salted butter softened – I always, always use salted butter. If you don’t have any on hand, you can use unsalted and add an extra pinch of salt to the dough.
- Granulated sugar
- Eggs
- Butter flavoring – If you do not have butter extract, you can sub in vanilla extract BUT you will be missing that buttery yellow cake flavor.
- Vanilla extract – This is the perfect supporting cast member. It adds a subtle hint of flavor without distracting from the other elements of the cookie.
- All-purpose flour
- Baking powder
- Salt
- White candy melts – I like the Ghirardelli brand! I highly suggest sticking with the white candy melts vs using white chocolate. The white chocolate has a stronger flavor and takes away from the star of the show, the buttercream.
- Red candy melts
- Green sanding sugar
Christmas Tree Cake Buttercream:
- Salted butter, softened – Again, I use salted butter but unsalted will also work.
- Powdered sugar
- Vanilla extract
- Heavy cream
- Christmas Tree Cakes – Yes, THE Little Debbie’s Christmas Tree Cakes.
- Green and red sprinkles
How to make Christmas Tree Cake Cookies
Christmas Tree Cake Buttercream
- Start by making the buttercream. Begin by whipping the butter until smooth.
- Next, add in the powdered sugar, vanilla, and heavy cream. Mix until fully incorporated and smooth.
- To the frosting, add 5 whole Christmas Tree Cakes, and mix until incorporated. Be careful to not over mix! You still want a little bit of the texture from the cakes in your buttercream. This will be thick buttercream. Add in 1/4 cup of combined red + green sprinkles and fold in.
- Use a #48 cookie scoop (about 1 heaping Tbsp equivalent) to scoop dollops of buttercream. Flatten the scoop slightly with the palm of your hand and place onto a parchment-lined baking sheet. Place in the freezer to harden while making the dough.
- Preheat the oven to 350°F.
Cookie Dough + Assembly
- Make the cookie dough by creaming together the butter and granulated sugar until light in color and fluffy in texture. I like to use a stand mixer or an electric hand mixer for this.
- Scrape the sides of the bowl and add in the eggs, vanilla, and butter extract. Mix until well combined.
- Next, add the flour, baking powder, and salt. Mix until a soft dough forms.
- Scoop out your dough using a #12 cookie scoop (scant 1/3 cup equivalent). Flatten each dough ball into a disk about ½” thick.
- Remove buttercream dollops from the freezer and place one in the center of each dough disk.
- Close up the cookie dough around the frosting dollop and seal any cracks the best you can.
- Place the filled dough balls in a 4-inch round silicone mold to bake.
- Bake at 350° F for 15-17 minutes, or until the cookies no longer look wet and glossy on the top.
- Allow the cookies to cool completely in the mold. You can place it in the fridge to speed this up, if you’d like.
- Once the cookies have cooled completely, pop them out of the mold. Melt your white candy melts according to package instructions until smooth (typically in the microwave in 30 second intervals, stirring between).
- Spoon the melted candy melts (approximately 1 Tbsp) into the bottom of the same mold you just removed the cookies from. Press the cookies back into the mold.
- Allow the cookies/candy melts to set completely. Then turn the mold over and gently remove.
- Drizzle the tops of the cookie with a little extra white chocolate and top with green sanding sugar. Allow it to dry.
- Melt the red candy melts according to package instructions and pour into a piping bag or a plastic bag with the corner snipped off.
- Pipe lines similar to those on the Christmas Tree Cakes on each cookie.
- Let the candy melts finish setting up before serving, you can speed this process up in the refrigerator. Enjoy!
Karli’s Kitchen Faves
Here are a few of my favorite kitchen tools that I used to make this recipe!
- Kitchenaid Mixer – I really love this thing. It’s not necessary for making good cookies, but I love the size of the bowl and the power. It saves me a lot of arm aches.
- Round Baking Mold – This is what you will bake these cookies in! They make the nicest edges and are easy to clean.
- Piping bag – These are disposable, meaning you do not have to clean them ha. They are durable and won’t burst and leak your frosting. Use this (or just a ziplock bag with the corner snipped off) to pipe the red candy melts onto the cookie.
Storage
Store these cookies in an airtight container at room temperature and enjoy within 4 days.
These cookies will also freeze well. Allow the candy melts to set up completely and then place on a cookie sheet close together. Place the entire cookie sheet into the freezer and ‘flash freeze’ until they’re beginning to harden. Place cookies into a ziptop bag and freeze. Use within 3 months!
Christmas Cookie Faves

Christmas Tree Cake Cookies
Ingredients
Christmas Tree Cake Buttercream:
- ½ cup (111g) salted butter, softened
- 2 cups (214g) powdered sugar
- 2 tsp vanilla extract
- 3 Tbsp heavy cream
- 5 Christmas Tree Cakes
- 1/4 cup red and green sprinkles
Sugar Cookie:
- 1 ½ cups (333g) salted butter, softened
- 1 ½ cups (345g) granulated sugar
- 3 eggs
- 3/4 tsp butter extract
- 1 tsp vanilla extract
- 4 ½ cups (684g) all-purpose flour
- 3 tsp baking powder
- ½ tsp salt
- 10 oz white candy melts (I used Ghirardelli)
- 4 oz red candy melts
- Green sanding sugar

Instructions
- Start by making the buttercream. Begin by whipping the butter until smooth.½ cup (111g) salted butter, softened
- Next, add in the powdered sugar, vanilla, and heavy cream. Mix until fully incorporated and smooth.2 cups (214g) powdered sugar, 2 tsp vanilla extract, 3 Tbsp heavy cream
- To the frosting, add 5 whole Christmas Tree Cakes, and mix until incorporated. Be careful to not over mix! You still want a little bit of the texture from the cakes in your buttercream. This will be thick buttercream. Add in red + green sprinkles and fold until incorporated.5 Christmas Tree Cakes
- Use a #48 cookie scoop (about 1 heaping Tbsp equivalent) to scoop dollops of buttercream. Flatten the scoop slightly with the palm of your hand and place onto a parchment-lined baking sheet. Place in the freezer to harden while making the dough.
- Preheat the oven to 350°F.
- Make the cookie dough by creaming together the butter and granulated sugar until light in color and fluffy in texture. I like to use a stand mixer or an electric hand mixer for this.1 ½ cups (333g) salted butter, softened, 1 ½ cups (345g) granulated sugar
- Scrape the sides of the bowl and add in the eggs, vanilla, and butter extract. Mix until well combined.3 eggs, 3/4 tsp butter extract, 1 tsp vanilla extract
- Next, add the flour, baking powder, and salt. Mix until a soft dough forms.4 ½ cups (684g) all-purpose flour, 3 tsp baking powder, ½ tsp salt
- Scoop out your dough using a #12 cookie scoop (scant 1/3 cup equivalent). Flatten each dough ball into a disk about ½” thick.
- Remove buttercream dollops from the freezer and place one in the center of each dough disk.
- Close up the cookie dough around the frosting dollop and seal any cracks the best you can.
- Place the filled dough balls in a 4-inch round silicone mold to bake.
- Bake at 350° F for 15-17 minutes, or until the cookies no longer look wet and glossy on the top.
- Allow the cookies to cool completely in the mold. You can place it in the fridge to speed this up, if you’d like.
- Once the cookies have cooled completely, pop them out of the mold. Melt your white candy melts according to package instructions until smooth (typically in the microwave in 30 second intervals, stirring between).10 oz white candy melts (I used Ghirardelli)
- Spoon the melted candy melts (approximately 1 Tbsp) into the bottom of the same mold you just removed the cookies from. Press the cookies back into the mold.
- Allow the cookies/candy melts to set completely. Then turn the mold over and gently remove.
- Drizzle the tops of the cookie with a little extra white chocolate and top with green sanding sugar. Allow it to dry.Green sanding sugar
- Melt the red candy melts according to package instructions and pour into a piping bag or a plastic bag with the corner snipped off.4 oz red candy melts
- Pipe lines similar to those on the Christmas Tree Cakes on each cookie.
- Let the candy melts finish setting up before serving, you can speed this process up in the refrigerator. Enjoy!


These are good, but 1/3 cup of dough per silicone mold is far too much and also requires more bake time. I used the exact same mold and it only made about 8 cookies and they rose way too high and had muffin tops, which then made them not fit in the mold to do the whit chocolate topping. I had to trim the edges. I would do 1/2 cup of dough next time. The flavor is great!
I’m in the process of making these and the Christmas Tree Cake Buttercream is AMAZING! Did have a question though – If I do heaping 1TBPSN dollops of buttercream it looks/feels like I’m going to have a lot of leftover buttercream if it is only supposed to make 12 cookies.
Should the cookies be completely enrobed in the melted white candy melts, or just the one side is being covered by the melts in the bottom of the tray? Like one side dipped and decorated, or a full dip like the covered Oreos some people make that are fully dipped?
I’m looking forward to making these and just want to make sure I do it right! 🥰
It will mostly just be on the top of the cookie, with some going down the sides from when you push the cookie back into the mold. But you can do it however you please!
Any advice on how to get the buttercream not to fully melt? My cookies look A LOT different than the picture posted
Hi, did you bake the cookies in the mold? Baking them free standing can create a lot of buttercream leakage.
Hi Karli, I do not have this silicone mold. And I am going to rework this with the valentines little Debbie cakes. I do have 4 in rings to bake the cookies in. Thoughts on this? Either way, I’ll figure it out 🤣 I made some for Christmas but totally bombed the filling so I need some redemption!!! Love all your content 😀
Hi! I think baking it in a ring would work great. Let me know how they turn out!